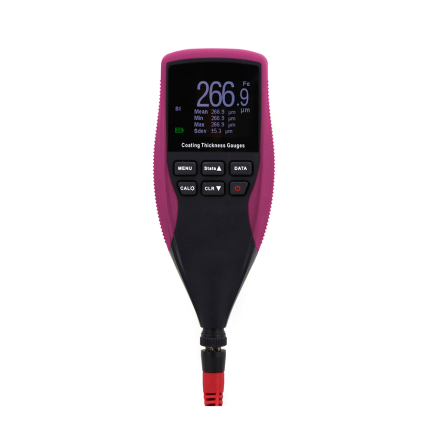
Description
Overview
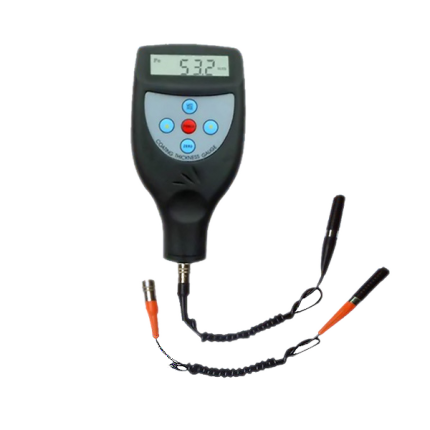
GAOTek Shore Hardness Tester with Peak Value Deposit Function is designed specially to measure sponge hardness with a measuring range varying from 0 ~ 100 HF. It is specially designed for determination of soft foam hardness, pillow hardness, and hardness of polyurethane foam rubber products. The large diameter presser foot and cylindrical indenter configuration allow measurement by direct application to the test specimen. The calculated measurements are displayed on LCD. It is small and light weight, which makes it easy to carry and is compatible with standards of ISO, DIN, ANSI and JIS.
Key Features
- It meets standards of DIN 53505, ISO 868, ISO 7619, ASTMD 2240, and JISK7215.
- With average calculate function.
- Peak value deposit function.
- Under-voltage alarm function.
- Use USB data output and RS-232 data output to connect with PC.
- Provide “Bluetooth data output” choice.
Technical Specifications
| Measuring Range | 0 ~ 100 HF |
| Accuracy | ≤ ±1 HF |
| Display | 0.393 in (10 mm) 4 digits display LCD with blue backlight |
| Resolution | 0.1 HF |
| Auto Switch Off | √ (Yes) |
| Indenter | Extension 0.1 in (2.54 mm) |
| Cylinder 0.99 in (25.2 mm) | |
| Power Off (2 modes) | Manual off by pressing the Power key till OFF shows on the display |
| Auto Power off after 2 minutes from last key operation | |
| Battery Indicator | Low Battery Indicator |
| Sensor Foot Diameter | 3.14 in (80 mm) |
| Sensor Head Diameter | 0.98 in (25 mm) |
| Power Supply | 4 x 1.5 V AAA Size (UM-4) Battery |
| Spring Force | 455 gf |
| Dimension | 6.4 in x 3.1 in x 3.1 in (162 mm x 80 mm x 80 mm) |
| Weight | 17.28 oz. (490 g)
(without batteries) |
| Humidity | < 80 % |
| Operating Temperature | 0 °F to 122 °F (0 °C to 50 °C) |
Additional Information:
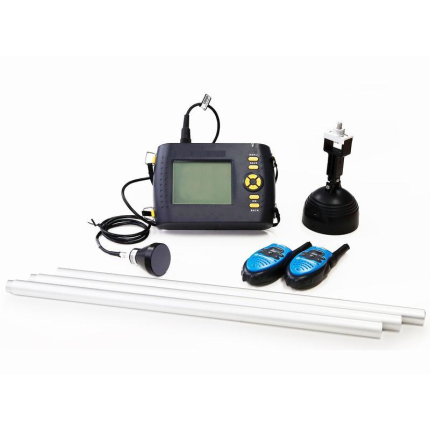
| Standard | GAOTek Shore Hardness Tester |
| Accessories | Carrying Case (B04) |
| Bluetooth Data Adapter with Software | |
| Operation Manual | |
| Optional Accessory | RS-232C Data Cable with Software |
Features
Shore Hardness Tester is an exclusive design for testing soft cellular materials. The large diameter presser foot and cylindrical indenter configuration allow measurement by direct application to the test specimen. It uses exclusive Micro-computer LSI circuit and crystal time base to offer high accuracy measurement. Digital display gives exact reading with no guessing or errors. It can communicate with PC for recording, printing and annualizing by the optional software and cable for RS232C interface. It has automatic power off facility to conserve power.
Measuring Procedure (How it works):
- When measuring the hardness, the specimen surface should be flat and parallel to allow the presser face to contact the specimen over an area of minimum 40 mm radius.
- Then depress and release the Power key to switch on the tester.
- Depress the ‘MAX’ key till the mark MAX shows on the display.
- Hold the Tester vertically with the point of the intender at least 12 mm from any edge. Place the tester onto the object to be measured. Hold for 1 or 2 seconds, the maximum reading can be obtained automatically.
- To take the next measurement just depress the ‘ZERO’ key and the repeat step 4. On the other hand, you can depress the ‘MAX’ key till the mark MAX disappears from the display. Then repeat steps 3 and 4.
- If other than a maximum reading is needed, no need to set the mark MAX showing on the display. In such case, the reading on the display is an instant value. Just hold the tester in place without motion and obtain the reading after the required time interval (normally less than 1 second).
- How to take the average value:
To take the average value of many times of measurements, just depress and release the ‘N/AVE’ key to make the symbol ‘N’ showing on the display, followed by a digit between 1-9 with the prefix ‘No’. Here the digit is the times of measurements used to calculate the average value. Every time depress and release the ‘N/AVE’ key, the digit will increase by 1. The digit will become ‘1’ while depressing the ‘N/AVE’ key at ‘9’.Adjust the digit to the number needed and depress ‘MAX’ key or ‘ZERO’ key to return to the measurement state or wait for several seconds till ‘0’ on the display.Take measurements as per steps from 3 to 5. Be sure that every test should be 6 mm apart. Every time you take a measurement, the reading and the times of measurements show on the display. When the times of measurements is equal to the number set, the unit first displays the reading of the last and then displays the average value of last ‘N’ measurements, followed by 2 beeps, along with a symbol ‘AVE’ indicating on the display.To take the next average value, just repeat the above step.To release from average measurement, just depress the “N/AVE’ till ‘N’ disappears.
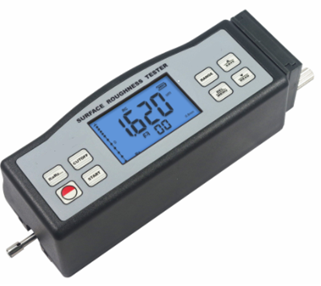
FRONT PANEL DESCRIPTIONS

CALIBRATION CHECK
- Zero calibration: Hold the Tester vertically with the point of the indenter hanging in the air, the reading on the display should be ‘0’. If not, depress the ‘ZERO’ key to make the tester display ‘0’.
- High end calibration: Just place the indenter onto the flat glass, apply enough force to make firm contact between the glass and the presser foot. The readings on the display should lie between 99.5 and 101. If not, press CAL key to carry out high end calibration.
BATTERY REPLACEMENT
- When the battery symbol appears on the display, it is time to replace the batteries.
- Slide the Battery Cover away from the tester and remove the batteries.
- Install batteries paying careful attention to polarity.
GENERAL MAINTENANCE
- Avoid crashes, intensive vibration, heavy dust, humidity, grease stains and strong magnetic fields.
- The sensor is a precise part and should be protected carefully. It is recommended to put it back in the box after each operation.
- Protect the standard sample plate belonging to the instrument carefully to avoid calibration faults caused by scratches.