Description
Overview
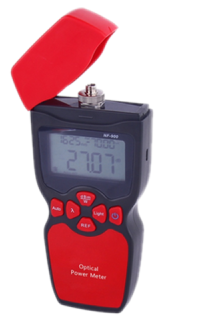
The GAOTek Visual Fault Locator for Fiber Breakage and Winding is used to inspect fiber failure by connecting with the optical interface. It locates faults in fiber breakage and winding. This instrument has a red light source of 650 nm. It can be used for single-mode or multi-mode optical fiber. It is an indispensable tool in the fields of fiber engineering, fiber project constructing, fiber network maintaining, and optical component manufacture and research.
Key Features
- Locates the fault of fiber breakage and winding
- Helps in end-to-end fiber recognition
- FC/SC/ST ports are changeable and available to connect detector against light leak or poor contact to greatly decrease possible radiation
- Simple buttons for convenient usage
- Protects the interfaces with a special lid
- LED light helps working in dark conditions
- The light emitted at LD TRAP has a long reach and powerful spotlight
- Push-pull dust cover and rubber bar for comfortable holding.
- Optimization of the machine connection point
- Continuous or pulse working modes interchangeable
Technical Specifications
| Wavelength | 650 nm ± 10 nm |
| Fiber Type | single mode/multi-mode |
| Connector | 0.098 in (2.5 mm) universal, ST, SC, FC interfaces |
| Emitting Energy | 5 mW/10 mW/20 mW |
| Working Temperature | -4 °F to +140 °F (-20 ℃ to +60 ℃) (no dew) |
| Storage Temperature | -40 °F to +185 °F (-40 ℃ to +85 ℃) |
| Power Supply | 1.5 V AAA battery |
Additional Information
Product Interface and Key Introduction
- ON/OFF
- Power indicator
- LED “Lighting” Key
- Dust cap
- Rubber Bar
- Red-light “Testing” Key
Usage
- Open the battery cover, install the 1.5 V batteries into the tester correctly
(Note: Pay attention to the cathode and anode of batteries, do not reverse batteries). Close battery cover.
- Open dust cover, pull out the rubber plug in FC port and turn on the power with power indicator lamp working. Then, press “Red Light” key you will see the red laser emitting from the optical interface continuously. Press “Red Light” key once more, the emitting light changes to pulse mode and the red laser will flash. Impulse frequency is in range of 2 Hz – 3 Hz or 9 Hz (Note: Do not stare directly at the beam for fear of damaging your eyes)
- Insert the fiber which you want to inspect into the optical interface, then press the “Red Light” key to choose the working mode of the light source (Continuum or Impulse).
- Press “Lighting” key to turn on the two LED lighting lamps when working in a dark environment. Press “Lighting” key again to turn off (On/Off).
- Press “Red Light” key again to turn off lighting source (Switch mode: Continuum-Impulse-Continuum).
- Put on dust cover if you have finished using the device and turn off power. Remove batteries if not using for a long time as the batteries may rot and destroy the light source.
Precautions and Care
- Do not expose the device to direct sunlight.
- Laser is harmful, so especially, you must protect your eyes. When the LD is working, please do not expose eyes to laser beams.
- It usually works in high temperatures that result in shortening of laser emitter’s life.
- The laser emitter’s interface should be maintained in clean status.
- The device’s push-pull interface works against heavy force.
- If the light source is not used please screw on the dust cap to prevent dust falling into the device
- Remove batteries if not using for a long time as the batteries may rot and destroy the light source.
- Don’t connect high voltage lines to avoid burning out the machine.
- Keep the device in a safe place to avoid hurting others, because of the sharp part
- Connect the cable to the right port.
- Read the user manual before using the device.
Applications of the Instrument
- Telecommunication
- CATV Engineering and Line Maintenance
- Integrated wiring construction and maintenance
- Fiber component production and research
- Other fiber engineering
Standard Accessories
- Fiber fault detector – 1
- Fiber malfunction tester tool-kit – 1
- 5 V batteries – 2
- FC fiber interface – 1
- SC/ST optical fiber interface – 1
- User manual – 1
- Certificate of approval – 1
- Color Box – 1


