Description
Overview
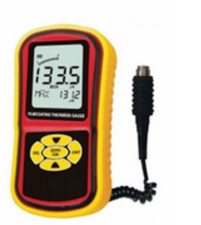
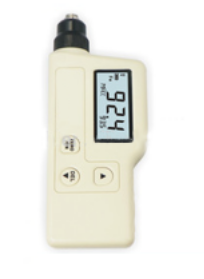
GAOTek Thickness Gauge for Film and Coating Measure (Data Analysis) is designed to measure the thickness of conductive coatings on the non-magnetic material in the range of 0 to 1800 µm. This tester adopts eddy current measurement principle and can be widely used in the fields of mechanical manufacture, electric power metallurgy and general aviation etc. It performs data analysis function such as average value, IN and MAX values, standard deviation and data number after measuring several groups of data. It provides accurate measurement using hi-sense vibration sensor.
Key Features
- LCD displays measurement result and conditions directly
- Measures acceleration (m/s2 peak), velocity (mm/s ms), and displacement (mm p-p)
- Selective vibration characteristic
- Uses hi- sense of vibration sensor which measures accurately
- Equipped with two probes (S and L) to adapt the different measurement requirements
- Handy magnetic probe to handle in all conditions.
- Low battery indication
- Auto turn off function
- LCD back light function
- Maximum value hold function
- Switch to °C/°F unit in the temperature
Technical Specifications
| Measurement Range | 0 to 1800 µm |
| Resolution | 0.1 µm/ 1 µm |
| Accuracy | ± (3% H + 1 µm) |
| LCD Display | 3 ½ ” display |
| Operating Current | Around 10 mA |
| LCD Backlight Function | 15 seconds |
| Battery Life | 20 hour continuously |
| Power Supply | 3 x 1.5 V AAA alkaline battery |
| Auto Off | 80 seconds |
| Low Battery Indication | 3.0 V ± 0.2 V |
| Dimension | 2.83 in × 1.38 in × 5.71 in (72 mm × 35 mm × 145 mm) |
| Weight | 7.64 oz. (216.5 g) |
| Operating Humidity | 10 % to 95 % rh |
| Operating Temperature | 32 ˚F ~ 104 ˚F (0 ˚C ~ 40 ˚C) |
Additional Information
Diagram of the unit:

- Connector (With direction indicator)
- LCD display
- ZERO/ON: Power on/ Set zero
- DEL : Data delete key
- ▼ : Menu (single measure SNG, Continuously measure CTN, Average measure Average, Maximum measure MAX) page down and basic calibration key
- Unit : Unit convert between Metric and Imperial standards
- ▲ : Menu (single measure SNG, Continuously measure CTN, Average measure AVG, Maximum measure MAX) PageUp and basic calibration key.
- Sensor
LCD display

- Battery power symbol, shows the battery power
- Measure value dynamic bar
- NFe: Non-ferrous measuring
- Measurement value display area
- Measurement mode, Data analysis indication
- M: Memory record status
- µmil: Imperial/ Metric unit change (1mil= 0.0254mm=25.4μm)
- Recorded data display
- Measuring range symbol

 : Backlight indication, the backlight will be off after no further operation for 15 seconds.
Operation instructions
Substrate ad standard piece
Standard piece:
- All the sample with a known thickness could be used as a standard calibration piece and in short referred to as standard piece.
- The coated standard piece
An even firmly-coated standard piece with a known thickness could be used as a Standard Piece too, and in terms of the application of this product, the coating must be non -conductive
Substrate:
- The standard substrate’s roughness and electrical property, must be close to those of the material to be measure. To identify the suitability of the substrate, compare the outputs from the standard piece with the material to be measured.
- If the thickness of the material is in the range of the regulated, two methods could be selected to calibrate.
- To calibrate a metal Standard Piece that with same thickness as the material to be measured.
- Use a similar electricity standard metal gasket piece which have enough thickness for calibration, be sure that there is not spacing between substrates.
- If the curvature of the material is too big to be calibrated on the flat surface, please ensure that the coated standard pieces curvature has the same thickness as the material to be measured.
Connect between handle sub- unit and main unit
Pay attention to indicator direction

Plug in and Plug-out method:
Plug the sensor into the main unit’s sensor socket with same direction. Press until the sensor plug produces a locking sound to ensure the connection was in a locking status.
When plug out, push up the sensor plug’s metal cover to disable the locking status. Then pull out the sensor plug.
Caution:
Do not handle it violently less hurt the surface!
Turn on the unit
- Pull up the snap of the battery door to open it and insert the battery included in the package, then close the door and lock it up.
- Press the “ZERO/ON” key to turn on the unit, as shown in following figure:

Caution:
Pay attention to the polarity of the battery less damage the instrument.
3.After the entire screen displays for 1 second, the default state is single test mode, if the LCD screen displays the symbol please promptly replace the battery, as shown in following figure:

Calibration
To ensure the precise test result, please calibrate the instrument at the test scene. The instrument has three different calibrations methods: zero point calibration, two point calibration, and basic calibration.
- Zero point calibration:
- Take a measurement on a standard substrate or on an uncoated substrate. LCD display a data, for example,
0.3 μm, like the following picture

2.Do not lift the detect tip and press the “ZER/ON” key, the buzzer will sound, that signal indicated the zero point calibration is completed. LCD displays as shown below:

Repeat step a, b to make basic measure value less than 1 m, this can improve measurement precision.
- Two point calibration:
- Calibrate zero point first.
- Take a measurement on the standard piece which thickness close to the target piece. (Like 1000 µm), if the LCD display 1008 µm, like the following picture:

3.Do not lift the detect tip and press the “▲”and “▼” key to adjust the reading as same with the standard piece, after these calibration is complete, the instrument is ready to use. LCD displayed like the following picture:

To ensure a precise two point calibration, repeat step b and c to improve measurement precision and reduce incidental error.
Basic calibration:
It is necessary to change the basic calibration under the following conditions:
———-the top of the detect head is worn off
———-after the detect head is maintained
———-Special use
———-the product has not been used or calibrated for a long time
- Prepare six standard pieces.
- Hold the “▲” key and press the “ZERO/ON” key to turn on the unit, LCD displayed as following:

When LCD display 0.0um, you can take zero calibration.
3.Choose a standard piece at thickness 50, when obtain a reading for 50.0, LCD displays as following:

Press “▲”and “▼” key to adjust the display value to be equals with the standard piece’s thickness, and then place the next standard piece on the base to calibrate.
4.Repeat the above steps until the last standard piece is calibrated, after the unit auto power off and the new calibrated value have been saved in the memory.
Turn on the unit, and it is now ready to measure.
Unit selection
Press “ZERO/ON” key to turn on the unit, and then press UP/DOWN key to change the mode, when LCD display UNT, that means enter the unit selection mode.
The default unit is um, LCD displays as shown below:
Press “UNIT” key, you can select your desired unit on um to umil, LCD displays as shown below:
Single measurement
Prepared target piece you want to test.
- Press “ZERO/ON” key to turn on the unit, the default test mode is single test mode, LCD displays as shown below:

- Contact detect head with the test surface vertically and press the detect head lightly, LCD displays a value for example, 109 μm, and buzzer sounded at this time, LCD displays as shown below in the picture:

- When the second measurement is finished, SNG counter will automatic upgrade to 2. The maximum SNG counter is 15.
When it is full, it will stop to increase the number.


- To detect each time place head contact the test surface vertically, a reading will be generated with a beep of buzzer. For another measurement, lift the detect head, and repeat the operation above.
Caution:
During self-calibration, keep the sensor at least 15 cm away from standard base.
Continuous measurement
- Turn on the tester, and press “▼”/“▲” key to select the test mode, when LCD displays CTN, which means continuous measurement mode.
LCD displays as following picture:


- Place the detect head to the target piece you want to measure, and then press the detect head lightly to measure, the buzzer will not sound during the measurement, LCD will display the measured result continuously, the last measure value will be saved in the test automatically, the quantity of the data are also be memorized, LCD display CTN1 at the same time in the below picture (The max memory is up to 15th, including SNG memory):

Standard Deviation measurement
- Turn on the tester, and press “▼”/“▲” key to change the test mode, when LCD display “DIF”, that mean the tester turn into standard deviation measurement mode.

- Place the sensor head to the target piece you want to measure, then press the detect head lightly to measure, the buzzer beeps, LCD will display the value of the difference between the last reading and the current reading as shown below:

Data record/ recall and delete
- Record:
The measurement result will be saved automatically after every measuring and the measurement quantity will be increase one by one, the max number is 15.
- Data recall:
Press “▲”and “▼” key to review the measurement values when he measurement number is flashing.
- Delete:
- Delete the current data: when you do not want to delete one of the stored data, you can press the “▼” key to go back to the last one when the measurement number is flashing, and then take another measurement for replace the stored data.
- Delete all the data: you can delete all data by pressing the “DEL” key for 2 second when the measurement quantity is flashing.
Data analysis
The tester also provide data analyze function after measured several groups of data, press “▼”/“▲” key to change mode, LCD will display average value (AVG), MAX, MIN, Standard Deviation(dFR), data number(NO), LCD displays as following picture:

Caution:
- When the measurement number is flashing, please press “ZERO/ON” key to stop it. And press “▼”/“▲” key to change mode.
- The tester will power off automatically in 80 seconds. If no further operation happens.
Other items
Attentions
- Factors which affect the measurement precision and some instruction:
- Electrical property:
The conductivity of the metal, determined by the material content and heat treatment, will finally influence the output of measurement, so calibrate with the same electrical property of the standard sheet as the substrate material
- Thickness of substrate metal:
Every instrument is subject to a critical thickness of a certain substrate metal which allows the measurement could be taken when the thickness is larger than the critical.
This unit’s critical thickness (minimum substrate thickness) is 0.5mm.
- Verge effect:
The unit is sensitive to the steep change on the surface of the target piece. So the output obtained near the verge or inner angle of the piece is not reliable. Therefore, measurement on curved surface, the result is not reliable.
- Curvature:
The curvature of the target piece may affect the measurement result. This effect will be increased as the curvature’s radius reduced.
- Roughness degree of the surface:
The roughness degree of substrate metal and coating may affect the measurement result. The bigger the roughness degree is, the bigger the effect is. Rough surface will cause system error and incidental error.
You should increase the measurement number at different place to reduce incidental error. If the substrate metal is rough, you must adjust ZERO point on the substrate metal which is not coated and has similar roughness with the target one; or you can use impregnate which cannot erode the substrate metal to dissolve the coating, and then to adjust the ZERO point.
- Adhesive layer:
The unit is sensitive to the attachment between the test head and the coating, so you must clear the layer to make sure the test head contact the coating directly.
- The detect head’s pressure:
The pressure on the target piece can affect the measurement value, so to maintain a basic constant pressure.
- Detect head’s angle:
The angle of the test head affects the measurement. You must be sure the detect head to be contact the target piece is at a right angle.
- The target piece’s distortion:
The detect head can make the target piece of soft coating distort, if the distortion is too big, the measurement value is not correct.
- Attentions in operation:
- The property of substrate metal
For eddy current method, standard pieces in line with the substrate in conductivity and roughness of the surface roughness is similar.
- The thickness of the substrate:
Check whether the substrate’s thickness is less than the critical thickness 0.5mm.
- Verge effect:
Do not measure at the locations where there are steep shape change of the measured, i.e. Verge, hole or inner corner and so on.
- Curvature: Do not measure at the distorted surface.
- The readings:
Because the readings may not be identical all the time, so you should several measurements at the same area. The local difference of the coating also requests to measure several times at the specified area especially rough surface.
- Cleanness of surface:
You should clear all the adhesive layer on the surface like dust, grease, rust etc. Before taking measurement, but do not remove any coating.
- about the measurement reading:
- As per statistics, single value in not reliable enough, so all the output readings are average value of multiple measurements that is carried out by the unit within hundreds of milliseconds.
- To ensure more precision reading, you can measure several times, and then delete the max error one, at last use analysis function to get five statistical data: average value (AVG), MAX, MIN, standard warp (dFR), data number (NO).
- According to the international standard, the final measure result can expressed as the following formula:
CH=A+/-2D
CH—the thickness of the coating
A—-the average value of the measure data (AVG)
D—–standard warp (dFR)
Maintenance:
- Replacement and upkeep of battery:
a.After power on, if a battery icon appears on the LCD, you need to replace the battery immediately
b.Remove the battery from the unit if it is not required for extended periods of time in order to avoid damage to the battery compartment and the erosion resulting from a battery leakage.
2.Do not store or use the unit in following circumstances:
a.Splashes of water or high levels of dust.
b.Air of high salt or Sulphur content.
c.Air mixed with other gases or contents.
d.High temperature or humidity (above 50 °C, 90%) or direct sunlight.
3.Do not disassemble the unit or attempt any internal alterations.
4.Never use alcohol or diluents to clean the housing for doing that will especially erode the LCD surface; just clean the unit lightly as needed with little clean water.


