Description
Overview
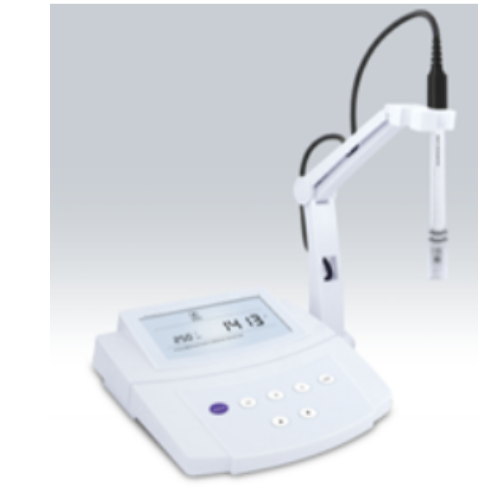
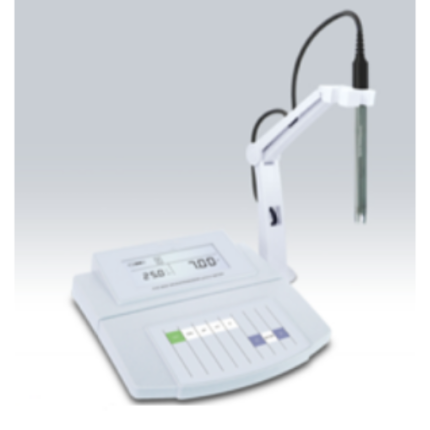
GAOTek PH Meter with mV/Temp (Temp. Compensation, 3 Point Calib) is designed using 3 point calibration for high accuracy measurements and supports automatic temperature compensation over the complete pH range from -1.00 pH~15.00 pH. It comes with an easy-to-use holder for mounting the temperature probe and pH electrode. This high performance device is packaged with three pH buffer packets required for calibration (pH4.01, 7.00, 10.01). It is equipped with a clear LCD screen that is used to show mode indicators, measured values, and help message.
Key Features
- System menu allows setting the 5 parameters, including the pH buffer standard, number of calibration points, temperature unit, hold function, etc.
- Auto-Hold function freezes stable measured value for easy viewing and recording.
- Selectable temperature unit (°C or °F) meets different application requirements.
- Manual temperature calibration improves the measurement accuracy of meter.
- Automatic Temperature Compensation provides accurate reading over the entire pH range.
- High performance laboratory pH meter is equipped with a large LCD display.
- 1 to 3 points push-button calibration with auto-buffer recognition (USA and NIST standards).
- Automatic electrode slope display helps user decide whether to replace sensor.
- Help message supports operational guide that helps you quickly begin using the meter.
- Reset feature automatically resumes all parameters back to factory default settings.
Technical Specifications
| pH | |
| Range | -1.00 pH~15.00 pH |
| Resolution | 0.01 pH |
| Accuracy | ±0.01 pH |
| Calibration Solutions | USA (pH 4.01/7.00/10.01) |
| Calibration Points | 1 to 3 points |
| Compensation Mode | Manual or Automatic |
| Temperature Compensation | 32 °F~212 °F, 0 °C~100 °C |
| mV | |
| Range | -1000 mV~1000 mV |
| Resolution | 1 mV |
| Accuracy | ±1 mV |
| Temperature | |
| Range | 32 °F ~ 221 °F, 0 °C~105 °C |
| Resolution | 32.18 °F, 0.1 °C |
| Accuracy | ±33.8 °F, ±1 °C |
| Temperature Units | °C or °F |
| Calibration Range | Measured value ±50 °F, ±10 °C |
| Others | |
| Reset Function | Yes |
| Display | LCD 5.33 in×2.95 in (135 mm×75 mm) |
| Hold Function | Manual or Automatic |
| Power Requirements | DC9 V, using AC adapter, 220 VAC/50 Hz |
| Power Off | Manual or Automatic (180 minutes after last key pressed) |
| Connector | BNC |
| Dimensions | 8.26 in×8.07 in×2.95 in (210 mm×205 mm×75 mm) (L×W×H) |
| Weight | 3.30 lbs (1.5 kg) |
Additional Information
ACCESSORIES:
- pH Electrode
- Temperature Probe
- pH Buffer Pouches (pH 4.01/7.00/10.01)
- DC9 V Power Adapter

Display
The pH meter is equipped with a clear and bright LCD display that is used to show measured values, mode indicators and help message. The following table describes the meaning of each indicator.

Keypad
The meter has a succinct membrane keypad, names and symbols describe the each function key controls.
| KEY | FUNCTION |
| MEAS| |
Power the meter ON/OFF.
Freezes the measured value on the display, press the key again to resume measuring. In the calibration or temperature setting mode, exits current mode and returns to measurement. |
| MODE | Toggles between pH and mV measurement modes. |
| CAL| |
Press the key to enter the calibration mode.
Press and hold the key to enter the setup menu. |
| °C | Press the key to set the temperature or enter the temperature calibration mode. |
| ▲ | Press the key to increase setting value. |
| ▼ | Press the key to decrease setting value. |
| ENTER | Confirms the calibration, setting value or displayed option. |
Connecting the Electrode Holder
The device comes with an easy-to-use holder for mounting the pH electrode and temperature probe. If necessary, follow the steps below to install the electrode holder.
The device comes with an easy-to-use holder for mounting the pH electrode and temperature probe. If necessary, follow the steps below to install the electrode holder.
- The base of the electrode holder with an irregular round

- The electrode arm has a plastic

- Insert the plastic rod into the irregular round hole and swivel the electrode arm 90°. Electrode holder is now ready to swing into desired

ADJUSTMENT OF ELECTRODE ARM:
After installation, if the electrode arm automatically rises or falls, you need to adjust the screws until arm locate at any position.
- Remove the plastic cover from the electrode

- Use the screwdriver to tighten the screw moderately.
- Insert the plastic cover to previous position. Installation is completed.
Connectors

The meter provides 4 connectors for connecting the various types of sensors and power adapter. Listed below are the details of these connectors.
INDEX:
| NO. | CONNECTOR | FUNCTION |
| 1 | pH | For connecting the pH or ORP electrode |
| 2 | REF | For connecting the reference electrode |
| 3 | ATC | For connecting the temperature probe |
| 4 | For connecting the DC9 V power adapter |
Connecting the pH Electrode
- Take out the pH electrode from the packaging. Follow the steps below to place the electrode into left or right sides of the electrode arm.

- Insert the BNC connector into corresponding connector socket. Rotate and push the connector clockwise until it locks. After connection is completed, do not pull on the sensor cord. Always make sure that the connector is clean and

Connecting the Temperature Probe
The pH meter comes with a temperature probe for measuring temperature of the sample. When probe is connected to meter, Automatic Temperature Compensation function will start immediately.
- Place the temperature probe into the circular hole of electrode.

- Insert the connector of probe into the corresponding connector socket (Marked “ATC”). Ensure the connector is fully

Connecting the Power Adapter
- Before plugging in the power adapter, ensure that its voltage matches your local main voltage.
- Insert the connector of power adapter into the power socket on the meter. The meter is now ready for use.

Preparing the pH Buffer Solutions
The instrument is packaged with three pH buffer packets required for calibration.

- Open the pH7.00 buffer packet, place the powder into a 250ml volumetric flask. Pour distilled water 250ml to scale line, mix the solution until reagent is completely dissolved.

- Preparation of pH4.01 and 10.01 standard buffer solutions are the same as above.
- Prepared standard buffer solutions should be stored in hermetically sealed glass container
Prior to Use
Remove the protective cap from the bottom of the pH electrode. If the glass sensitive membrane on the electrode dries out, soak the sensor in 3 M KCL solution or tap water for at least 15 minutes. Do not use distilled or deionized water, it will shorten the life of sensor.

Power On/Off
- Press MEAS key to turn on the meter, the display shows measured value.
- Press and hold the MEAS key for 5 seconds, the meter will turn off.
- If you do not press any key for 3 hours, the meter will turn off automatically.
Setup Menu
The pH meter contains an integrated setup menu that allows you to customize each displayed option to meet measurement requirements.

Setting the Default Parameters
- Press and hold the
 key for 3 seconds to enter setup menu, the meter shows default pH buffer optio

- Press ▲or▼key to select the USA or NIST standard, press ENTER key to confirm. The meter goes to calibration point selection mode, the display shows 2 points calibrat

- Press ▲or▼key to select the number of calibration points, press ENTER key to confirm. The meter goes to temperature unit selection mode, the display shows “UNIT/°C

- Press ▲or▼key to select the desired temperature unit (°C or °F), press ENTER key to confirm. The meter shows “HOLD/NO” indicating that the auto-hold function is

If the auto-hold function is enabled, the meter will automatically sense a stable endpoint reading and freeze it. If you disable this function, the meter allows user to freeze the reading by pressing the HOLD key.
- Press ▲or▼key to enable or disable the auto-hold function, press ENTER key to confirm. The meter shows “OFF/NO” indicating that the auto-off function is

When the auto-off function is enabled, if you do not press any keys within 3 hours, the meter will automatically turn off.
- Press ▲or▼key to enable or disable the auto-off function, press ENTER key to confirm. The meter shows “RST/NO” indicating that the meter should not be reset.

- Press ▲or▼ key to enable or disable the reset function, press ENTER key to confirm. The meter returns to measurement mode. Setting is completed.
EXIT THE SETUP MENU:
During the setup mode, press MEAS key, the meter returns to measurement mode immediately.
Temperature Compensation
In order to get accurate measuring results, you need to enable the manual or automatic temperature compensation before measurement or calibration.
AUTOMATIC TEMPERATURE COMPENSATION:
Insert the connector of temperature probe into corresponding “ATC” socket, the display immediately shows “ATC” indicator. The meter is now switched to automatic temperature compensation mode.

MANUAL TEMPERATURE COMPENSATION:
- Do not connect the temperature probe to meter. Press °C key to enter the temperature setting mode.
- Press ▲or▼key to set temperature value.
- Press ENTER key to confirm. Setting is completed.
pH Calibration
The pH meter allows 1 to 3 points calibration. You should perform at least 2 points calibration for high accuracy measurement. The meter will automatically recognize and calibrate to following standard buffer values.
USA Standard Buffer Options: pH 4.01, 7.00, 10.01
NIST Standard Buffer Options: pH 4.01, 6.86, 9.18
Single point calibration should only be carried out with pH 7.00 or 6.86, otherwise calibration will not be accepted.
The meter must be calibrated prior to first use or new electrode replaced. To ensure accuracy, regular calibration is recommended. Do not reuse calibration solution after calibration, contaminants in solution will affect the calibration and eventually the accuracy of the measurement.
SINGLE POINT CALIBRATION:
1.1 Make sure that you have selected 1 point calibration in the setup menu.
1.2 Rinse the pH electrode with distilled water.
1.3 Press CAL key, the meter shows “CAL1/pH7.00” (or “CAL1/pH6.86”).

1.4 Dip the pH electrode into the pH7.00 (or pH6.86) standard buffer solution. Stir the sensor gently.
1.5 Press ENTER key to confirm. Wait for the measured value to stabilize, the display shows “END”. Single point calibration is completed.

2 POINTS CALIBRATION:
2.1 Make sure that you have selected 2 points calibration in the setup menu.
2.2 Repeat steps 1.2 to 1.5 above. When the first calibration point is done, the display will show “CAL2”. The meter prompts you to continue with second point calibration.

2.3 Rinse the pH electrode with distilled water. Dip the electrode into the pH4.01 or 10.01 (pH4.01 or 9.18) standard buffer solution. Stir the sensor gently.
2.4 Press ENTER key to confirm. Wait for the measured value to stabilize, the display shows electrode slope and “END”. Second point calibration is completed.

3 POINTS CALIBRATION:
3.1 Make sure that you have selected 3 points calibration in the setup menu.
3.2 Repeat steps 1.2 to 1.5 above. When the first calibration point is done, the display will show “CAL2/pH4.01”. The meter prompts you to continue with second point calibration.

3.3 Rinse the pH electrode with distilled water. Dip the electrode into the pH4.01 standard buffer solution. Stir the sensor gently.
3.4 Press ENTER key to confirm. Wait for the measured value to stabilize, the display shows electrode slope and “CAL3/pH10.01” (or “CAL3/pH9.18”).

3.5 Rinse the pH electrode with distilled water. Dip the electrode into the pH10.01 (or pH9.18) standard buffer solution. Stir the electrode gently.
3.6 Press ENTER key to confirm. Wait for the measured value to stabilize, the display shows electrode slope and “END”. The meter automatically returns to measurement mode. Calibration is completed.
Temperature Calibration
During the measurement, when automatic temperature compensation is enabled, if the temperature reading displayed differs from that of an accurate thermometer, you need to calibrate the meter.
- Make sure the connecter of temperature probe had connected to the meter.
- Press °C key to enter the temperature calibration mode, the display shows current temperature

- Press ▲or▼key to set the temperature value.
- Press ENTER key to confirm. Calibration is completed.
pH Measurement
- Press MODE key until the display shows measurement unit “pH”.
- Rinse the pH electrode with distilled water to remove any impurities adhering to the probe body.
- Dip the electrode into the sample solution, stir the sensor gently to create a homogeneous sample.
- Wait for the measured value to stabilize, record the reading on the display.
mV Measurement
- Press MODE key until the display shows measurement unit “mV”.
- Rinse the electrode thoroughly with distilled water.
- Dip the electrode into the sample solution, stir the sensor gently.
- Wait for the measured value to stabilize, record the reading on the display.
Hold Function
The device contains two data hold modes. When the Auto-Hold function is enabled, the meter will automatically sense a stable endpoint reading and freeze it, “HOLD” indicator appears on the display. If the Auto-Hold function is disabled, press key, the meter will immediately freeze currently displayed value. Press the key again to resume measuring.

Electrode Care and Maintenance
Since pH electrode is susceptible to dirt and contamination, clean as necessary depending on the extent and condition of use.
AFTER MEASURING:
Rinse the pH electrode in distilled water, store the sensor into the electrode storage solution.
CLEANING THE ELECTRODE:
- Salt deposits: Soak the pH electrode in warm tap water to dissolve deposits, then thoroughly rinse with distilled water.
- Oil or Grease film: Wash the electrode bulb gently in some detergents and water. If necessary, use the alcohol to clean the electrode bulb, then rinse with distilled water. Place the sensor in the electrode storage solution for 30 minutes.
- Clogged reference junction: Heat a diluted KCl solution to 158 °F (70 °C). Place the sensing part of the sensor into the heated solution for about 10 minutes. Allow the sensor to cool in some unheated KCl solution.
- Protein deposits: Prepare a
 pepsin solution in 0.1 M of HCL. Place the electrode in the solution for 10 minutes. Rinse the sensor with distilled water.
REACTIVATING THE ELECTRODE:
If stored and cleaned properly, the electrode should be ready for immediate use. However, a dehydrated bulb may cause sluggish response. To rehydrate the bulb, immerse the electrode in a pH 4.01 buffer solution for 10 to 30 minutes. If this fails, the electrode requires activation.
- Soak the pH electrode in 0.1M HCl for 5 minutes.
- Remove and rinse with distilled water, then place in 0.1 M NaOH for 5 minutes.
- Remove and rinse again, and soak in electrode storage solution for 30 minutes.
Optional pH Electrodes
The pH meter is equipped with a general purpose pH electrode, if it cannot fully meet your measurement requirements, please refer to the table below to select an applicable sensor.
| SAMPLE TYPE | P11 | P12 | P13 | P14 | P16 | P17 | P18 | P19 | P20 | P21 |
| Agar | ● | |||||||||
| Beer | ● | ● | ● | ● | ● | ● | ● | |||
| Blood Products | ● | ● | ● | ● | ● | |||||
| Bread, Dough | ● | ● | ||||||||
| Cement | ● | |||||||||
| Cosmetics | ● | ● | ● | ● | ● | ● | ||||
| Dairy Products | ● | ● | ● | ● | ● | |||||
| Education | ● | ● | ● | ● | ||||||
| Fats/Cream | ● | |||||||||
| Field Use | ● | ● | ● | ● | ||||||
| Fish Products | ● | ● | ||||||||
| Lab Flasks | ● | |||||||||
| Low Ionic | ● | ● | ||||||||
| Meat, Cheese | ● | ● | ||||||||
| Micro Samples | ● | |||||||||
| Paint | ● | ● | ● | |||||||
| Photographic | ||||||||||
| Soil | ● | ● | ||||||||
| Surface | ● | |||||||||
| Test Tubes | ● | ● | ||||||||
| Tris Buffer | ● | |||||||||
| Viscose Samples | ● |


