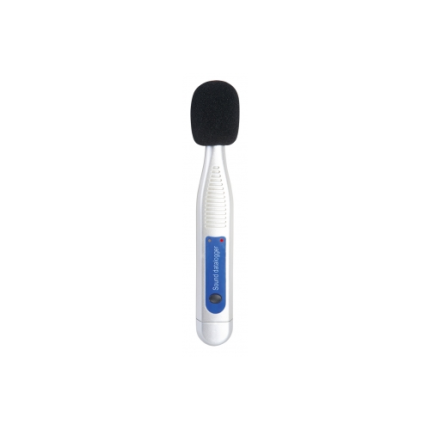
Description
Key Features
- Handy sound source for quick and easy calibration of sound level meters and sound measuring systems.
- Accurate and stable performances.
- Sensitivity calibration of microphones.
- Suitable for field and laboratory use.
- 100 hours battery life
- Light weight and easy to carry
- Extremely low influence of static pressure
Technical Specifications
| Sound Pressure Level | 94 dB, 114 dB |
| Accuracy | 0.5 dB, 0.3 dB |
| Frequency | 1000 Hz |
| Standard | GB/T15173, ANSI S1.40, CLASS2, IEC942 |
| Calibration of Microphones | 1″, 1/2″ |
| Power Supply | 9 V 6F22 |
| Battery Life | 100 hours |
| Dimension | 142 mm x 47 mm x 47mm |
| Weight | 275 g |
| Temperature Coefficient | 0 dB/ °C to 0.01 dB/ °C |
| Operating Temperature | -10 °C to +50 °C |
| Storage Temperature | -40 °C to +65 °C |
Additional Information
Front panel descriptions

3-1 Transducer Cap
3-2 Microphone adaptor
3-3 Battery Cap
3-4 OFF/ON (94 or 114 dB select switch)
3-5 Lo Battery Indicator (LED)
The Sound Level Meter Calibrator (ND9a, ND9b) is calibrated to produce 94 dB at sea level. When the unit is operated above sea level a slightly lower sound level is emitted depending on altitude. For each 2000 feet of elevation above sea level the ND9 produces 0.1 dB less than the 94 dB rating. As an example, the calibrator will only emit 93.7 dB at an elevation of 6,000 feet. Therefore, a sound level meter should be set at 93.7 dB, not at the rated 94 dB.
The effects of temperature are less than ±0.05 dB/°C (reference is 23°C).
Operation
The Sound Level Meter Calibrator (ND9a, ND9b) is designed to check the accuracy of many types of sound instruments. GAOTek sound level meter commonly use the standard 1/2-inch diameter ceramic microphone which fits directly into the calibrator coupler cavity. When testing an instrument with a 1 inch microphone, the proper adaptor ring must first be taken out. This keeps a close tolerance fit around the microphone head. Be sure the microphone fits down inside the adaptor and rests on the lower rim. This rim supports the microphone and forms the necessary inner seal.
Operation procedure
- Set Calibrator switch to 94 dB or 114 dB position. A 1000 Hz tone should be heard.
- Turn on the sound level meter which is to be calibrated.
- Carefully insert the microphone into the calibrator coupler. Be sure the microphone is down inside the coupler resting flush on the lower coupler rim.
- When calibration has been made, carefully remove the microphone and turn calibrator to OFF.
Battery replacement
When it is necessary to replace batteries, that is battery indicator become dim, unscrew bottom ring, slide off face plate and outer shell to expose batteries.
Care of the instrument:
- Immediately clean any spilled materials from the Instrument and wipe dry. If spillage is corrosive, use a suitable cleaner to remove it and to neutralize corrosive action.
- Remember to turn off the Instrument when not using it.
- Avoid prolonged exposure or usage in areas subject to temperature and humidity extremes, vibration, mechanical shock, dust, corrosive fumes, and strong electrostatic and electromagnetic interference.
- Be sure the transducer cap is firmly in place.
- If the Instrument has not been used for 30 days, check battery for leakage, and replace if necessary.
- When the Instrument is not in use, store it in a room free from temperature extremes, dust, corrosive fumes, mechanical vibration, or shock. If storage time is expected to exceed 30 days, remove the battery.


