Description
Overview
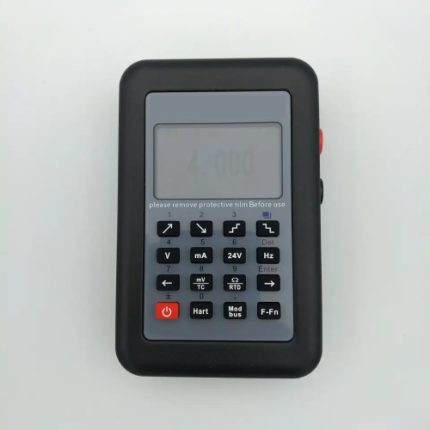
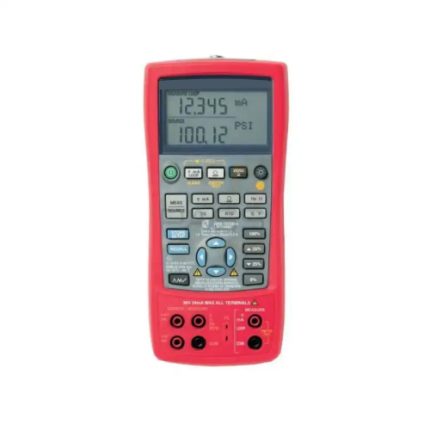
GAOTek Temperature Calibrator with DC Voltage (Resistance, RTD) adopts high-performance ARM microprocessor, can output DC voltage, resistance, thermocouple and RTD along with quick response and stable data. It comes with a true-color TFT-LCD display; keypad and touch screen operation. It also supports high precision measurement and is easy to operate. The calibrator boasts rapid response time, stable data and high precision measurements, deeming it one of the top temperature calibrators available. It is highly cost-effective and is suitable for lab applications.
Key Features
- DC voltage output
- Thermocouple output
- Resistance output
- RTD output
Technical Specifications
| FUNCTION | RANGE | SOURCE | RESOLUTION | ACCURACY |
| DCV | 100 mV | -10.00 ~ 110.00 mV | 0.01mV | ±0.05%
Set point ±30 uV |
| 1000 mV | -100.0 ~ 1100.0 mV | 0.1mV | ±0.05%
Set point ±0.3 mV |
|
| OHM | 400 Ω | 0.0 ~ 400.0 Ω | 0.1Ω | ±0.05%
Set point ±0.2 Ω |
|
TC |
T | -328 °F ~ 752 °F
(-200 °C ~ 400 °C) |
32.18 °F
(0.1 °C) |
±0.05%
Set Point ±2 °C (<=-100 °C) ±1°C (>-100 °C) |
| K | -328 °F ~ 2462 °F
(-200 °C ~ 1350 °C) |
32.18 °F
(0.1 °C) |
||
| J | -328 °F ~ 2192 °F (-200 °C ~ 1200 °C) |
32.18 °F
(0.1 °C) |
||
| N | -328 °F ~ 2372 °F
(-200 °C ~ 1300 °C) |
32.18 °F
(0.1 °C) |
||
| E | -328 °F ~ 1832 °F
(-200 °C ~ 1000 °C) |
32.18 °F
(0.1°C) |
||
| S | -4 °F ~ 3182 °F
(-20 °C ~ 1750 °C) |
33.8 °F
(1 °C) |
±0.05 %
Set point ±3 °C (<=100 °C) ±2 °C (>100 °C) |
|
| R | -4 °F ~ 3182 °F
(-20 °C ~ 1750 °C) |
33.8 °F
(1 °C) |
||
| B | 1112 °F ~ 3272 °F
(600 °C ~ 1800 °C) |
33.8 °F
(1 °C) |
±0.05% Set point ±3 °C(<=400 °C ~ 600 °C) ±2 °C (>600 °C) | |
| RTD | PT100 | -328 °F ~ 752 °F
(-200 °C ~ 400 °C) |
32.18 °F
(0.1 °C) |
±0.05%
Set point ±0.6 °C |
| CU50 | -58 °F ~ 302 °F
(-50 °C ~ 150 °C) |
32.18 °F
(0.1 °C) |
||
| Test Environment | ||||
| Operating Temperature | 59 °F ~ 95 °F (15 °C ~ 35 °C) | |||
| Humidity Range | 80 % RH or less | |||
| Storage Temperature | 50 °F ~ 104 °F (10 °C ~ 40 °C) | |||
| Humidity Range | 10 ~ 90 % RH | |||
| Warm-up Time | > 60 minutes | |||
| Calibration Time | 12 months | |||
| General Specifications | ||||
| Battery Parameters | 8.4 V Li, 1400 mA rechargeable battery | |||
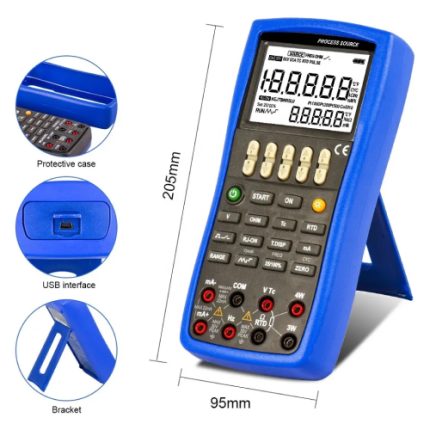
| Size | 3.54 in x 7.68 in x 1.38 in (90 mm x 195 mm x 35 mm) | |||
| Weight | Approx. 14.11 oz. (400 g) | |||
| Power Supply | Input:100 – 240 V ~ 50/ 60 Hz 0.35 A
Output:9 V 1 A DC |
|||
| Display | 2.8″ true-color 16 M TFT-LCD display;
Touch screen |
|||
| Interface | Mini-USB | |||
| Others | Compatible with SCPI instruction set;
Adjustable back light; Automatic power off |
|||
Additional Information
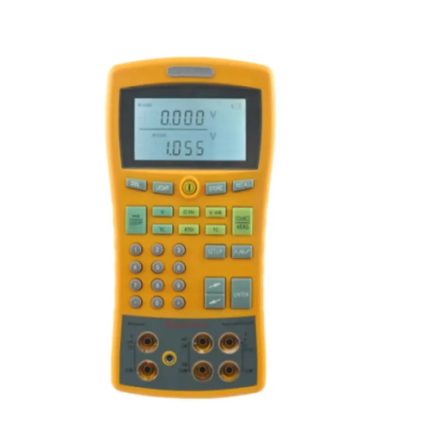
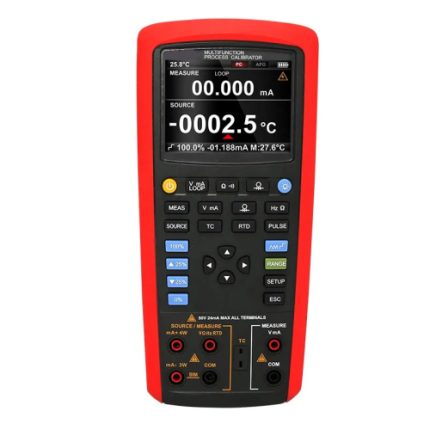
Front Panel Summary
Front Panel

Description of the Front Panel
| 1 | TFT-LCD Screen |
| 2 | Select Keys |
| 3 | MEAS Measurement Key |
| 4 | SYST System Key |
| 5 | Power On/Off Battery Charging Indicator |
| 6 | RTD Sensor access terminal |
| 7 | Thermocouples Sensor access terminal |
| 8 | Background Brightness——30%,50%,70%, 100% Unlock the Keypad Lock |
| 9 | HOLD NULL |
| 10 | SETUP Enter Setup |
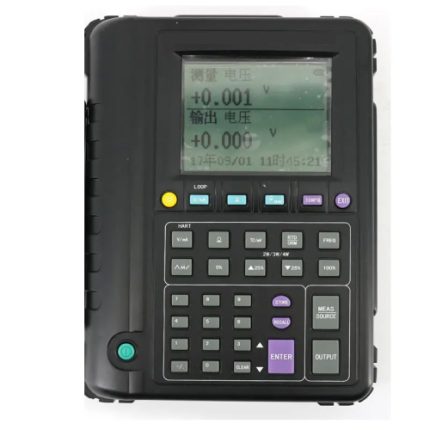
LCD Screen

LCD Screen descriptions
| 1 | The Page Title |
| 2 | Blue for the tab bar , white for functional information |
| 3 | Signal output settings |
| 4 | Blue for the tab bar , white output signal value range |
| 5 | Help and Information line |
| 6 | Functional areas, each position corresponds to a function key |
| 7 | Battery Percentage and Keypad Lock Indicators |
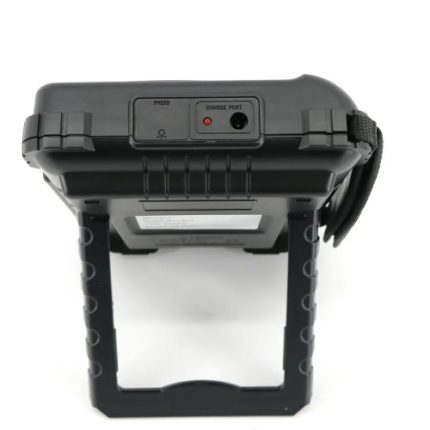
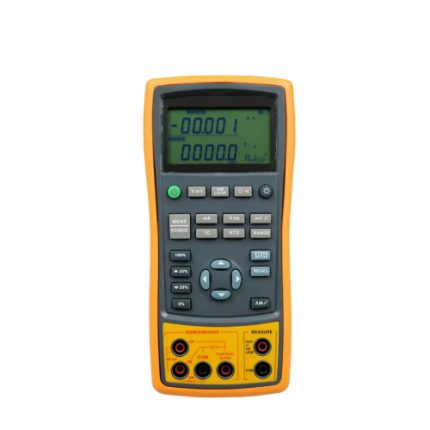
Interface
Interface panel

Interface panel description
| 1 | Remote Control Interface (USB-HID) |
| 2 | Buzzer |
| 3 | Power Adapter Jack (+9 V DC) |
External Power and Battery
The Battery can only be charged by its Power Adapter. While using the external power supply, the power adapter is also charging the battery.
Power Adapter

Charge Li Battery
When the battery power is low, you could use the power adapter to charge the Startup battery. The Power key is orange indicating while charging the battery.
Charging LED (Orange)

Attention!
The key is orange while charging even when the calibrator meter is off previously.
Power Up
Press the Power key softly to start it.
[MEAS] Page
<MEAS DISPLAY>
On pressing the [Meas] key, the page appears. Page mainly highlights the measurement results. The following measurement controls can be set:
- Set output value
<MEAS DISPLAY> Page

Setting Output Value
Steps to set output value
| Step 1 | Press[Meas] key to enter <MEASURE DISPLAY> page |
| Step 2 | Use【◀】and【▶】keys to select the output setting bit |
| Step 3 | Use【▲】and【▼】keys to change the set bit value can be automatically carry or abdicate |
[SETUP]Page
This section includes all setup functions. At any time, press [SETUP] to enter <SETUP> page.
<Setup> Page
In < SETUP> page, the Instrument does not display any results when testing is not in progress.
The setup includes
- FUNC –Choose the type of the thermocouple
- VOL –Temperature Unit Setting
- TC – Sampling Rate
- RTD – Beep Setting
- UNIT – Temperature Unit
- RJ – Temperature Compensation

[FUNC] Setting
The FUNC set includes: DC Voltage, Thermocouple, Resistance, and RTD.
Steps to set the FUNC
| Step 1 | Press [Setup] key to enter <SETUP> page | |
| Step 2 | Use cursor keys to select [FUNC]field | |
| Step 3 | Use soft key to select | |
| Soft Key | Function | |
| VOL | Output DC voltage | |
| TC | Output thermocouple | |
| R | Output Resistance | |
| RTD | Output RTD | |
Setting
V set Includes: V, mV
Steps to set V
| Step 1 | Press [Setup] key to enter <SETUP> page | |
| Step 2 | Use cursor keys to select [V] field | |
| Step 3 | Use soft key to select | |
| Soft Key | Function | |
| V | Voltage output range [-0.1~1.1V] | |
| mV | Voltage output range [-10.00~110.00mV] | |
[TC] Setting
The TC set includes: TC-T, TC-K, TC-J, TC-N, TC-E, TC-S, TC-R, and TC-B.
Steps to set TC
| Step 1 | Press [Setup] key to enter <SETUP> page | |
| Step 2 | Use cursor keys to select [TC] field | |
| Step 3 | Use soft key to select | |
| Soft Key | Function | |
| TC-T | T-type thermocouples | |
| TC-K | K-type thermocouples | |
| TC-J | J-type thermocouples | |
| TC-N | N-type thermocouples | |
| TC-E | E-type thermocouples | |
| TC-S | S-type thermocouples | |
| TC-R | R-type thermocouples | |
| TC-B | B-type thermocouples | |
[RTD] setting
The RTD set includes: PT100, CU50
Steps to Set the RTD:
| Step 1 | Press [Setup] key to enter <SETUP> page | |
| Step 2 | Use cursor keys to select [RTD] field | |
| Step 3 | Use soft key to select | |
| Soft Key | Function | |
| PT100 | PT100 thermal resistance | |
| CU50 | CU50 thermal resistance | |
[UNIT] setting
The UNIT set includes: °C, K, F
Steps to Set the UNIT:
| Step 1 | Press [Setup] key to enter <SETUP> page | |
| Step 2 | Use cursor keys to select [UNIT] field | |
| Step 3 | Use soft key to select | |
| Soft Key | Function | |
| °C | Celsius | |
| K | Degrees Kelvin | |
| F | France Degree | |
[RJ] setting
The RJ set includes: OFF, ON
Steps to Set the RJ:
| Step 1 | Press [Setup] key to enter <SETUP> page | |
| Step 2 | Use cursor keys to select [RJ] field | |
| Step 3 | Use soft key to select | |
| Soft Key | Function | |
| OFF | Close temperature compensation | |
| ON | Open temperature compensation | |
[SYSTEM] Page
This section includes all system information. At any time, press [SYST] key to enter [SYSTEM] page.
<SYSTEM CONFIG> Page
Following information can be configured in the page.
- LANGUAGE
- FILE
- TOUCH PANEL
- BRIGHTNESS
- DIM DISPLAY
- APO – Auto Power Off
<SYSTEM SETUP> Page

[LANGUAGE]
You can switch system language
Procedure to change language
| Step 1 | Press [SYST] key to enter <SYSTEM SETUP> page | |
| Step 2 | Select [LANGUAGE] | |
| Step 3 | ENGLISH | Switch to English |
[FILE]
Procedure of file setting
| Step 1 | Press [SYST] key to enter <SYSTEM SETUP> page | |
| Step 2 | Select [FILE] Field | |
| Step 3 | AUTO | All parameters set by user will be saved in system. |
| IGNORED | The parameters will be lost after power off | |
| SAVE NOW | All parameters set by user will be saved in system. | |
[TOUCH PANEL]
Tips
The calibrator meter can work well without touch panel. But you cannot type number without touch panel. When you want to input numbers, the touch panel will be activated even if it is shut down in system setting.
Procedure of setting touch panel
| Step 1 | Press [SYST] key to enter <SYSTEM SETUP> page | |
| Step 2 | Select [TOUCH PANEL] Field | |
| Step 3 | ENABLE | Enable touch panel |
| DISABLE | Disable touch panel | |
| CALIBRATE | Calibrate touch panel | |
| RESET | Reset touch panel data | |
Procedure to calibrate touch panel
| Step 1 | Press [SYST] key to enter <SYSTEM SETUP> page |
| Step 2 | Select [TOUCH PANEL] Soft Key |
| Step 3 | Select [CALIBRATE] Soft Key |
| Step 4 | Use a screen pen to click screen softly to start calibration |
| Step 5 | Tap the middle of the circle with a pen on Left-Up corner. Then tap the middle of the circle with a pen on the Right-Bottom corner to finish the calibration. |
| Step 6 | Click on the screen softly to exit. |
Tips:
You will need a screen pen to calibrate touch panel. Do not use your finger!
[BRIGHTNESS]
Four degrees of brightness: 30%, 50%, 70%, 100%
Press ![]() to change the brightness
to change the brightness
Tips:
If powered by external power, the brightness is 100%.
If powered by battery, low brightness can make the meter work longer.

Brightness key
Procedure to change brightness
| Step 1 | Press [SYST] key to enter <SYSTEM SETUP> page | |
| Step 2 | Select [BRIGHTNESS] field. | |
| Step 3 | 30% | 30% of full brightness |
| 50% | 50% of full brightness | |
| 70% | 70% of full brightness | |
| 100% | Full brightness | |
DIM DISPLAY [DIM]
Procedure to dim display:
| Step 1 | Press [SYST] key to enter <SYSTEM SETUP> page | |
| Step 2 | Select [DIM DISPLAY] | |
| Step 3 | 5 Minutes | 5 minutes later, brightness becomes 30% |
| 10 Minutes | 10 minutes later, brightness becomes 30% | |
| 20 Minutes | 20 minutes later, brightness becomes 30% | |
| 30 Minutes | 30 minutes later, brightness becomes 30% | |
| OFF | Dim Display Off | |
Tips: Timer will be reset when you press any key or touch screen.
AUTO POWER OFF [APO]
Procedure of set auto power off:
| Step 1 | Press [SYST] key to enter <SYSTEM SETUP> page | |
| Step 2 | Select [APO] | |
| Step 3 | 5 Minutes | 5 minutes later, power off |
| 10 Minutes | 10 minutes later, power off | |
| 20 Minutes | 20 minutes later, power off | |
| 30 Minutes | 30 minutes later, power off | |
| OFF | [APO] Off | |
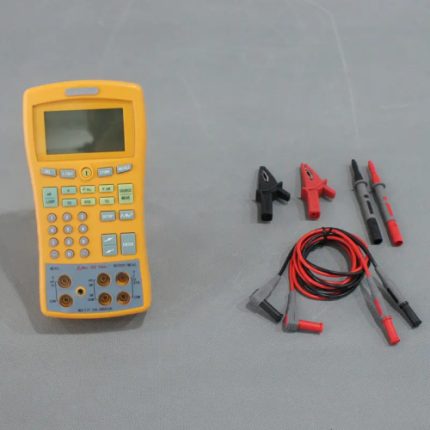
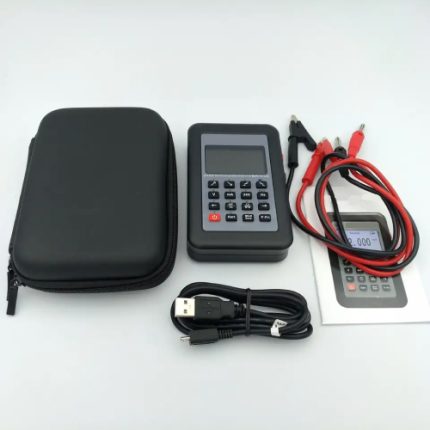
UNPACKING AND INSPECTION
Packing List
After you receive the instrument, carry out checks during unpacking according to the following procedure.
- Check that the packing box or shock-absorbing material used to pack the instrument has not been damaged.
- Refer to the packing list; check that all packed items supplied with the meter have been provided as per the specified options.
- If damaged or accessories shortage is there, please contact the sales department or our customer care agent.
Power Requirements
The Temperature Meter can only use our configured AC Adapter and Li-battery.
AC Adapter
Input Voltage: 90 V – 260 V AC,49 Hz ~ 62 Hz
Power: Max 10 VA
Warning: Other model AC Adapter is forbidden. Only rechargeable Li-battery can be used.
Operation Environment
Ensure that the operation environment meets the following requirements
Temperature Range: 32 ~ 131 °F (0 °C ~ 55 °C)
Humidity: 73.4 °F (23 °C), <70% RH
Altitude: 0 ~ 2000 m
Cleaning
Do not attempt to clean the internal of the Instrument.
Warning: Don’t Use Organic Solvents (such as alcohol or gasoline) to clean the Instrument. Use a dry cloth or a cloth slightly dipped in water to clean the casing.
Replace Battery
Built-in rechargeable Li-battery, battery has been installed in the instruments from factory itself. Change the battery according to the following steps:

Battery Change
- Use the screwdriver to loosen the screw in the battery cover and remove the cover.
- Remove the old battery; plug a new one.
- Put the new battery in the instrument, re-cover and tighten the screws.
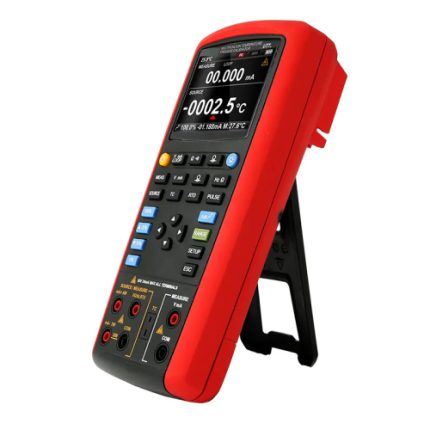
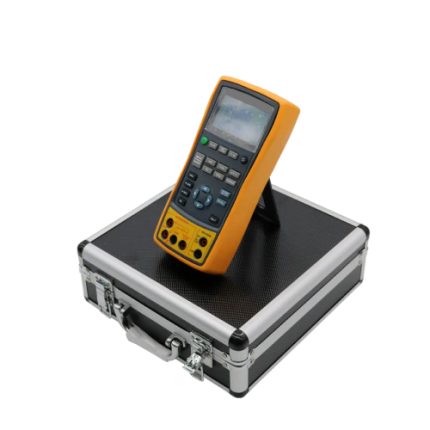
Adjusting Tilt Stand
Two positions are provided: degree 60 and degree 45
Degree 45 can provide a better stability to the instrument
Position of Degree 60

Fold up the bottom of the bracket to achieve degree 45 position