Description
Overview
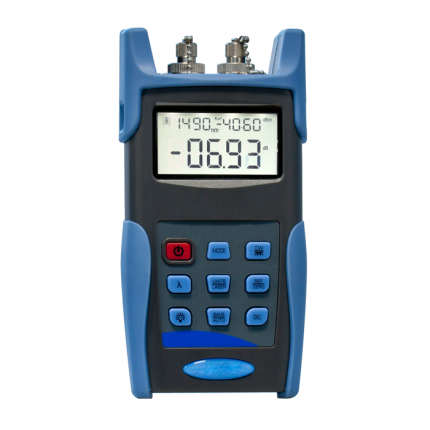
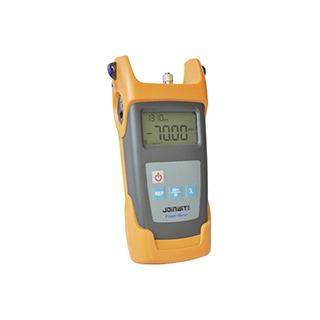
The GAOTek Optical Power Meter with High Resolution is used in fiber-optic installation and maintenance and features high display resolution, multi-wavelength precise measurement (850 nm, 980 nm, 1310 nm, 1550 nm), and an auto power off function. It can be used for linearity and non-linearity test, displaying both direct and relative tests of optical power. This product is a compositive optical power meter aimed at optical network operation, maintenance, and equipment research and development. It is widely used in the tests of LAN, WAN, metropolitan networks, CATV, or long-distance fiber networks.
Key Features
- Multi-wavelength precise measurement for a measurement range: 850 nm, 980 nm, 1310 nm, 1550 nm
- High display resolution level and test accuracy: Linearity display-1 %, Logarithm display 0.01 dBm
- Absolute power measurement of dBm or μW
- Relative power measurement of dB
- Auto OFF function and energy-save design
- 270 Hz, 330 Hz, 1 KHz, 2 KHz frequency light identification and indication
- Low voltage indication
- Has storage, page up/down functions for the test figure
- Able to memorize and manage 50 groups of measured data
- Handheld, light, easy to use with large LCD screen and backlight LCD
- Applicable to versatile adapters (FC, ST, SC, LC)
Technical Specifications
| Wavelength | 800 nm – 1600 nm |
| Detector Type | InGaAs |
| Measurement Range | -70 dBm to 10 dBm, -50 dBm to 26 dBm |
| Uncertainty | ±5 % |
| Calibrated Wavelength | 850 nm, 980 nm, 1310 nm, 1550 nm |
| Resolution | 0.01 dBm |
| Optical Connector | FC (interchangeable SC, ST) /as well as 0.09 in (2.5 mm) universal |
| Battery | 2 pcs AA batteries |
| Battery Operating Life | No less than 75 hours (according to battery volume) |
| Auto Power Off Time | 10 mins |
| Operating Temperature | 14 °F to 122 °F (-10 °C to 50 °C) |
| Storage Temperature | -22 °F to 140 °F (-30°C to 60°C) |
| Relative Humidity | 0 % to 95 % RH (non-condensing) |
| Dimension | 6.29 in x 2.99 in x 1.10 in (16 cm x 7.6 cm x 2.8 cm) |
| Weight | 0.46 lbs (210 g) |
Additional Information

- Dustproof cap
- Photoelectric detector
- LCD display screen
- Linearity/ non- linearity switch key (dB, dBm, μW)
- Store key
- On/Off key
- Wave length switch key
- Back light key
- Page-down key
- Last store figure browsing key
- Page-up key
- Clear key
- Test optical power figure
- Wave length or store groups display
Operation Method
- The LCD display
The optical power test figure will be displayed on the nether area of the LCD screen in the form of dB, dBm and μW, while the wave length and store groups are displayed in the top right corner of the LCD screen. These icons stand for the different function operations on the top left corner of the LCD screen.
- Switching <On/Off > key
You can realize switching the On/Off function when you press the <On/Off >key. The instrument will switch off automatically if there is no operation after 6 minutes of switching on.
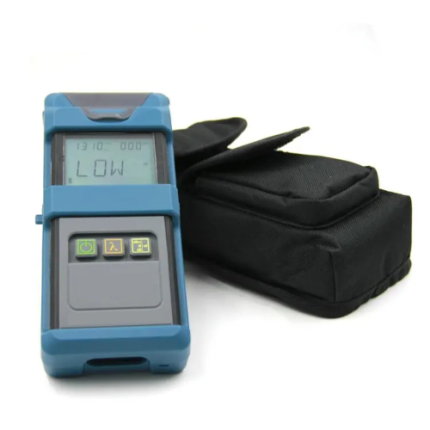
There is “1310 nm” displayed in the top right corner of the LCD after switching on and there is “NULL” displayed in the nether area of the LCD, it means that the instrument is emendate to zero. After that it will display “LO”and it enters the normal test state. If there is optical power input then the optical power will be tested automatically. The LCD screen will display “HI” if the input optical power exceeds the test upper limit of optical meter and the LCD screen will display “LO” if the input optical power is under the lower limit of optical meter.
- The <
 > key
> key
You can test the optical power in a certain wavelength and switch the measurement units of linearity and nonlinearity through this key. The absolute optical power figure tested lastly before the dB figure switches to the dB state is the referenced figure of the dB figure.
- The <λ> wave length choice key
You can choose one kind of four wave lengths, namely 850 nm, 980 nm, 1310 nm or 1550 nm, by pressing this key and the wave length which is chosen will be displayed in the top right corner of the LCD screen.
- The <
 > backlight key
Press this key and the back light LED will be bright. When the LED is bright, press this key. If there is no operation for over 5 seconds, the LED light will be closed.
- The < Store > key
You can save the current test figure when you press this key and there is the ![]() sign displayed in the top left corner, the serial number of stored groups will be displayed in the top right corner. The first stored figure will be replaced by the last one if the stored figures exceed 50 groups.
sign displayed in the top left corner, the serial number of stored groups will be displayed in the top right corner. The first stored figure will be replaced by the last one if the stored figures exceed 50 groups.
- The <Recall > key
The serial number of the figure last stored will be displayed in the top right corner when you press this key and the ![]() sign will be displayed in the top left corner; meanwhile, the wavelength figure and the optical power figure will be displayed in the LCD screen later.
sign will be displayed in the top left corner; meanwhile, the wavelength figure and the optical power figure will be displayed in the LCD screen later.
- The <▲> key
It can realize the page-up function when you press the key.
- The <▼> key
It can realize the page-down function when you press the key.
- The < Clear > key
There will be ![]() and
and ![]() displayed in the top left corner when you press this key and the stored figure will be cleared when the signs are shut.
displayed in the top left corner when you press this key and the stored figure will be cleared when the signs are shut.
- The under voltage indication function
The LCD will display the ![]() sign when the battery voltage is under 7.2 V and you should let the battery get charged or change the battery.
sign when the battery voltage is under 7.2 V and you should let the battery get charged or change the battery.
Operation Steps
- Connect the instrument to the fiber to test.

- Press On/off key to start the instrument. It will display
 It means tester could work naturally. After several seconds it will display 1310 nm.
 - Select the wavelength as desired by pressing λ key. It could provide following wavelengths: 1310 nm, 1550 nm, 850 nm and 980 nm. When you press the λ key the above value will be displayed one by one. Please leave the value you desired on the screen.
- Default unit is dBm and you could press dB/dBm key to toggle. They are dBm, dB and μW.
- Now you could perform the test.
- If there is data to save press Store key to finish it. And the record number will be displayed on screen.
- Press “Recall” key to browse the records by pressing ▲ or ▼
- After test is over press OFF key to close the tester.
- Press key to initiate the backlight.
Maintenance
- Please keep the sensor surface clean, do not use the dirty or nonstandard adapter tie-in.
- Do not insert into the port which has been poorly polished, otherwise, it will damage the sensor end.
- Please operate carefully to replace adapter for different linkers. The spare adapter should be stored hermetically to avoid dust.
- Please cover the dustproof cover to keep the interface clean when the optical power meter is not used. Please do not put the sensor in the air, or something of test error will be caused because of the dust.
- Please clean the sensor end regularly
- In order to make the service time of battery as long as possible, please recharge it every three months. Please take out the battery if it is not used for a long while to avoid damaging it.
If there is ![]() sign displayed during the operation process, please close the instrument and charge the battery using the charger.
sign displayed during the operation process, please close the instrument and charge the battery using the charger.
The charge indicator light in the charger is red during the charge process and when the indicator light becomes green, it means that the charge is done. The charge duration is about 8 to 10 hours. Then you can use the instrument.
Troubleshooting
Standard Accessories
- ST Adapter – 1
- SC Adapter – 1
- Charger – 1
- User Manual – 1