Description
Overview
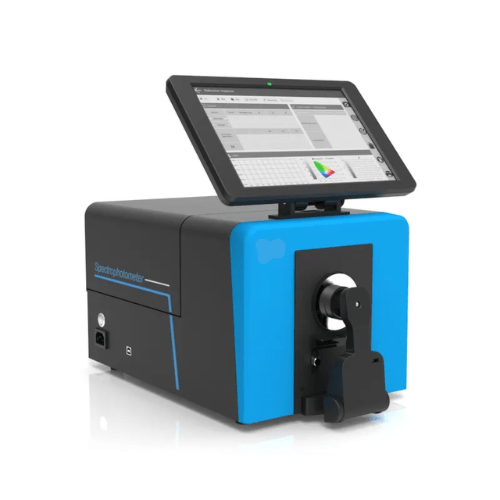
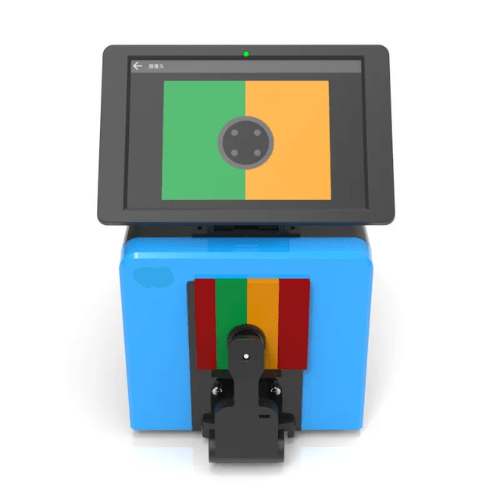
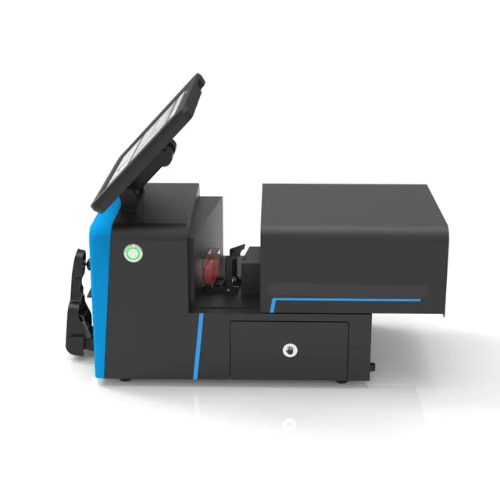
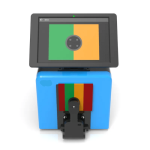
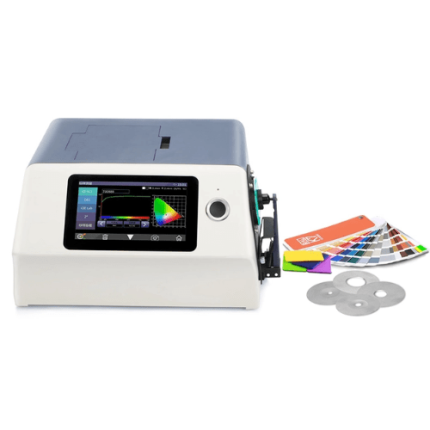
GAOTek benchtop spectrophotometer colorimeter is independently developed by this company, who has complete intellectual property rights. A 10.5 in (26.67 cm) touch PAD is used as a display interactive interface. According to CIE, the geometric optical structure D or 8 ° (reflection) and D or 0 ° (transmitted), the instrument can measure Reflection or Transmission and colorimetric data of various samples. The instrument with Φ1 in (25.4 mm), Φ0.59 in (15 mm), Φ0.31 in (8 mm), Φ0.16 in (4 mm) various reflective aperture to meet various test occasions. This instrument with accuracy and stability measurement, large storage capacity, equipped with USB and Bluetooth dual communication modes, and PC -site colour management software achieves more extension functions, which can be used for precision analysis and transmission of colour.
Technical Specifications
| Optical Geometry | Reflect D or 8 (diffused illumination, 8-degrees viewing angle) SCI (specular component included) or SCE (specular component excluded) Include UV or excluded UV light source Transmittance D or 0 (diffuse illumination 0° viewing) SCI (specular component included) or SCE (specular component excluded) Include UV or excluded UV light source SCI or SCE Include UV or excluded UV light source HAZE (ASTM D1003) Standards meet CIE No.15, GB or T 3978, GB 2893, GB or T 18833, ISO 7724 or 1, ASTM E 1164, DIN 5033 Teil 7, JIS Z 8722 under condition C |
| Integrating Sphere | 6.06 in (154 mm) |
| Measuring Aperture | 1 in (25.4 mm) or 0.59 in (15 mm) or 0.31 in (8 mm) or 0.16 in (4 mm) |
| Reflectance Range | 0% to 200% |
| Wavelength Range | 360 nm to 780 nm |
| Repeatability | delta E x ≤0.015 |
| PC Software | SQCX |
| Storage | Standard 5000 Pcs, Sample 40000 Pcs. |
| Characteristic | It is used for accurate analysis and transmission of laboratory colour. Apply in paints, inks, textiles, garments, printing and dyeing, printing etc industries for colour transfer and quality control.10.5 in (4.13 cm) rotatable display pad, 128 G storage, camera locatingInstrument can be measured on the side, upward measurement, and the downward measurement (use accessories) and other gestures.Open transmission warehouse, available thickness of 54mm transmitted samples.Automatic temperature and humidity compensation function.Built-in full spectral high life LED light source and Xenon lighting sources, testing fluorescent samples have better recognition. Built-in full spectral high life LED light source and Xenon lighting sources, testing fluorescent samples have better recognition. |
| Integrating Sphere Size | Φ6.06 in (154 mm) |
| Light Source Device | 360 nm to 780 nm Wavelength range, combined LED Light. Including UV, 400 nm cut-off light source, 420 nm Cut-off light source, 360 nm to 780 nm Xenon Lamp360 nm to780 nm Wavelength range, combined LED Light. Including UV, 400 nm cut-off light source, 420 nm Cut-off light source, 460 nm Cut-off light source360 nm to 780 nm Wavelength range, combined LED Light Including UV, 400 nm cut-off light source, 420 nm Cut-off light source,360 nm to 780 nm Xenon Lamp 360 nm to 780 nm Wavelength range, combined LED Light Including UV, 400 nm cut-off light source, 420 nm Cut-off light source, 460 nm cut-off light source |
| Spectrophotometric Mode | Concave Grating |
| Sensor | 256 Image Element Double Array CMOS Image Sensor |
| Wavelength Range | 360 nm to 780 nm |
| Wavelength Interval | 10 nm |
| Semi Band Width | 5 nm |
| Reflectance Range | 0% to 200% |
| Reflectivity Resolution | 0.01 |
| Measuring Aperture | Reflective |
| Specular Component | XLAV Φ1 in (25.4 mm) Φ1.18 in (30 mm), LAV Φ10.59 in 0.20 in(5mm) or Φ0.71 in (18 mm), MAV Φ0.31 in (8 mm) Φ0.3 in (10 mm), SAV Φ0.16 in (4 mm) or Φ0.24 in (6 mm)
Transmissive Φ1 in (25.4 mm) (No limit on sample height and width, but thickness ≤2.13 (54 mm) Remark Automatic identification of aperture switch Customized Configuration Caliber and lens position |
| Reflectance SCI & SCE or Transmittance SCI5SCE | |
| Colour Space | CIE LAB, XYZ, YXY, LCH, CIE LUV, Munsell, s-RGB, Hunter Lab, βxy, DIN Lab 99 |
| Colour Difference Formula | ΔE x ab, Δ Ex UV, ΔE 94, ΔE x CMC (2 1), ΔE x CMC (1 1), ΔE x 00, DIN ΔE 99, ΔE (Hunter), ΔE x CH, 555 Index |
| Other Colorimetric Index | WI (ASTM E 313, CIE or ISO, AATCC, Hunter, Taube, Berger Stensby) YI (ASTM D 1925, ASTM 313), ISO brightness, R 457 MI (Metamerism Index), Staining Fastness, Colour Fastness, Colour Strength, Opacity, APHA or Hazen or Pt-Co Index, Gardner Index Haze, Transmission (ASTM D1003), Say bolt index, ASTM D1500 Colour code, 8° Gloss, 555 Index, carbon (My, dM), Colour density CMYK (A,T,E,M), Tint, Colour density (part function achieved via software in PC) |
| Observer Angle | 2° or 10° |
| IL Iuminant | D 65, A, C, D 50, D 55, D 75, F 1, F 2, F 3, F 4, F 5, F 6, F 7, F 8, F 9, F 10, F 11, F 12, CWF, DLF TL 83, TL 84, TPL5, U 30, B, U 35, NBF ID 50, ID 65, LED-B1, LED-B 2, LED-B3, LED-B4, LED-B5, LED-BH1, LED-RGB1, LED-V1, LED-V2, LED-C2, LED-C3, LED-C5, customized light source (41 light sources in total, part achieved via software in PC) |
| Displayed Data | Spectrogram or Values, Samples Chromaticity Values, Colour Difference Values or Graph, PASS or FAIL Result, Colour Offset, Colour assessment, haze, liquid chromaticity |
| Measuring Time | 2.0 s (Measure SCI & SCE meantime about 4s) |
| Repeatability | Reflectance chromaticity value Φ1 in (25.4 mm) or SCI Standard deviation within ΔE x ab 0.01 (Under LED light source, when a white calibration plate is measured 30 times at 5 second intervals after white calibration)Reflectance chromaticity value Φ1 in (25.4 mm) or SCI Standard deviation within ΔE x ab 0.014 (When a white calibration plate is measured 30 times at 5 second intervals after white calibration)Reflectance chromaticity value Φ1 in (25.4 mm) or SCI Standard deviation within ΔE x ab 0.015 (When a white calibration plate is measured 30 times at 5 second intervals after white calibration)Reflectance chromaticity value Φ1 in (25.4 mm) or SCI Standard deviation within ΔE x ab 0.015 (When a white calibration plate is measured 30 times at 5 second intervals after white calibration)Reflectance chromaticity value Φ1 in (25.4 mm) or SCI, Standard deviation within ΔE x ab 0.015 (Under LED light source, when a white calibration plate is measured 30 times at 5 second intervals after white calibration) |
| spectrum reflectance or transmission ≤0.1% | |
| Inter-instrument Error | Φ 1 in (25.4 mm) or SCI, Within ΔE x ab 0.1
Φ 1 in (25.4 mm) or SCI, Within ΔE x ab 0.14 Φ 1 in (25.4 mm) or SCI, Within ΔE x ab 0.15 Φ 1 in (25.4 mm) or SCI, Within ΔE x ab 0.2 Φ 1 in (25.4 mm) or SCI, Within ΔE x ab 0.15 |
| (Average for 12 BCRA Series II colour tiles) | |
| Power | AC 24 V, 3 A Power adapter power supply |
| IL luminant Life Span | 5 years, more than 3 million times measurements |
| Display | 10.5 in (26.67 cm) rotatable display pad No |
| Data Port | USB & Bluetooth 5.0 |
| Data Storage | 128 G storage, above 100000 pcs Share with PC storage |
| Standard Accessory | Power Adapter, User Guide, U Disk (PC Software), USB cable, Standard Calibration Board, Black Calibration Cavity, Transmission black baffle, Sample holder, 25.4 Caliber, 15 Caliber, 8 Caliber, 4 Caliber, Transmissive Test Component, cuvette, 10.5 in (26.67 cm) screenPower Adapter, User Guide, U Disk (PC Software), USB cable, Standard Calibration Board, Black Calibration Cavity, Transmission black baffle, Sample holder, 25.4 Caliber, 15 Caliber, 8 Caliber, 4 Caliber, Transmissive Test Component, cuvette |
| Optional Accessory | Micro Aperture(4mm) transmission test clamp component, Instrument inversion components, culture dish, Film fixture |
| Operating Environment | 32 °F to 104 °F (0 °C to 40 °C) |
| Storage Environment | -4 °F to 122 °F (-20 °C to 50 °C) |
| Dimension | 17.32 in x 9.76 in x 11.14 in (440 mm x 248 mm x 283 mm) |
| Weight | Approx. 29.76 lb (13.5 kg) |


