Description
Overview
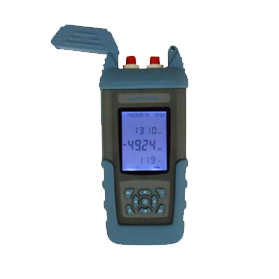
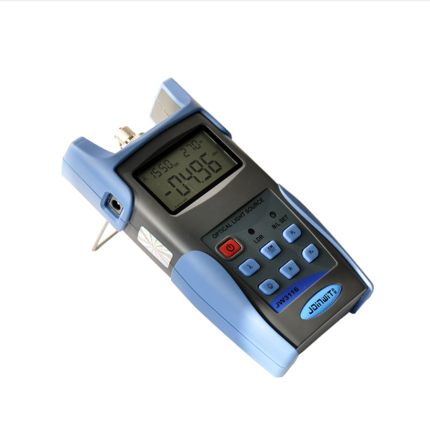
The GAOTek Handheld Optical Power Multimeter is an intelligent testing device used for performing optical network tests and operates at a wavelength range of 800 nm ~ 1700 nm. It provides both absolute and relative power tests and optical loss test. It offers the functions of a steady optical source and optical power meter simultaneously. It can conduct loop tests and two-way automatic tests. Its single-end test solution greatly advances the test efficiency. The internal microprocessor and linearity magnification technology ensure the long-term calibration and test accuracy. It is well suited for the construction and maintenance of fiber communications, CATV systems, and lab project development.
Features
- Single end for dual wavelength output, free switch from 1310 nm and 1550 nm
- Multiple adapters (FC, SC, ST, LC for power meter; FC, ST, SC for light source)
- 1000 groups of test data storage and management
- Light modulation and identification of 270 Hz, 330 Hz, 1 K, 2 KHz and auto wavelength identification mode
- Easy upload of test results with the use of USB interface
- Battery voltage display
- Records and displays time for data storage with the real time clock function
- Handheld and Easy to use
- Large LCD display
Technical Specifications
| Optical Power Meter Module Parameters | |
| Wavelength range | 800 nm~1700 nm
1310 nm, 1490 nm, 1550 nm, 1625 nm, 850 nm and 1300 nm |
| Detector type | InGaAs |
| Automatic frequency identification | 270 Hz, 330 Hz, 1 KHz, 2 KHz |
| Power range | -50~+26 dBm, -70~+10 dBm |
| Uncertainty | ±5 % |
| Resolution (dBm) | Linearity: 0.1 %
Logarithm: 0.01 dBm |
| Light Source Module Parameters | |
| Emitter type | FP-LD/DFB-LD |
| Dual working wavelength switch | 1310 ±20 nm
1550 ±20 nm |
| Spectral width | ≤5 nm |
| Output optical power | ≥-7 dBm, ≥0 dBm (customized) |
| Power Stability (Short time) | ≤±0.05 dB/15 min |
| Power Stability (Long time) | ≤±0.1 dB/ 5 h |
| Light output mode | CW continuous light and 330 Hz, 270 Hz, 1 KHz, 2 KHz modulation output |
| General Specifications | |
| Working temperature | 14 °F ~ 104 °F (-10 ℃~40 ℃) |
| Storage temperature | -4 °F ~158 °F (-20 ℃~+70 ℃) |
| Weight | 0.9 lbs (0.43 Kg) |
| Dimension | 7.8 in × 3.5 in × 1.6 in (200 mm × 90 mm × 43 mm) |
| Battery | 7.4 V/1000 mAh Li- rechargeable battery or AA battery |
| Battery working duration | ≥90 h (only optical power meter)
≥24 h (optical power meter & laser source) |
Additional Information
Operation
1. On/Off key:
- Press “
 ” for over 3 seconds to switch on
 - When the instrument is switched on, the device is in the optical power meter module with 1310nm wavelength. LCD displays the working wavelength, optical power, battery power, modulation frequency identification and so on
- Press “
 ” for over 3 seconds to shut down the device
 - The system will automatically shut down in 10 minutes. The LCD will display “Auto-OFF”
2. Open and close auto-off function:
In optical power meter module, press “![]() ” button and the auto-off function logo will disappear on the LCD. It means that the auto-off function is closed. Press “
” button and the auto-off function logo will disappear on the LCD. It means that the auto-off function is closed. Press “![]() ” again and the auto-off function logo will appear on the LCD. It means that the auto-off function is open and the tester will shut down in 10 minutes if left idle.
” again and the auto-off function logo will appear on the LCD. It means that the auto-off function is open and the tester will shut down in 10 minutes if left idle.
3. Backlight key:
Pressing “![]() ” can open or close backlight. If the backlight is closed, any operation can open 10 seconds backlight.
” can open or close backlight. If the backlight is closed, any operation can open 10 seconds backlight.
Introduction for optical power meter module
- Switch the measuring wavelengths
You can choose one of six kinds of wavelengths: 850 nm, 1300 nm, 1310 nm, 1490 nm, 1550 nm and 1625 nm through this key. The chosen wavelength will be displayed on the LCD screen. When the instrument is power-on, it defaults the wavelength of 1310 nm and circulates in the order of 1310 nm, 1490 nm, 1550 nm, 1625 nm, 850 nm, 1300 nm.
- Show absolute power and relative power value.
The instrument defaults the absolute measurement of optical power. The value displayed by main display 2 means logarithmic power value (dBm). The value displayed by main display 3 means linear power value (*W). Press the “▲” button, the instrument enters optical source output state; Press the “![]() ” button to quit the laser source module, return back to optical power test state.
” button to quit the laser source module, return back to optical power test state.
If you set laser in working state, these two modules can work at the same time
Introduction for light source module
- Open and close light source.
If it is the first time to enter into the status of light source output state, it does not output signal. And “1310nm”,”1550nm“or “Closing the light source” can be chosen circularly by pressing “λ”.
- The modulation output of light source.
When any wavelength is chosen, press “▲” or “▼” to realize the modulation selection of CW, 270 Hz, 330 Hz, 1 KHz, 2 Khz, –AU auto wavelength identification.
- Display the working status information of stable light source
The on the upper left of the LCD is blinking all the time when there is some working light source. It is forbidden to look at the output end of laser source or the connector of the optical fiber when the light source is under the power on status. The LCD displays the corresponding wavelength and modulation status when the tester is under the module of stable light source. When it is back to the module of optical power, the LCD displays the information of optical power, as well as the corresponding working light source, it will indicate 1310 nm or 1550 nm on the upper side of “Main display 1 “or “Main display 3”. It also shows the modulation frequency of the light source on the upper side of LCD. When the light source is under the modulation of “Auto”, its corresponding working light source (1310 nm or 1550 nm)will be blinking all the time.
Other functions:
Under voltage indication:
When it is under voltage, the indicator will show “![]() ”, and it will be powered off automatically if the voltage is lower than the protected value. Please change battery or charge it in time when it is under voltage, and the charging time is 4h~6h, when the indicator is turning from red to green, it indicates full voltage.
”, and it will be powered off automatically if the voltage is lower than the protected value. Please change battery or charge it in time when it is under voltage, and the charging time is 4h~6h, when the indicator is turning from red to green, it indicates full voltage.
- Maintenance
NOTE: The laser can cause damage to the eyes; do not look directly at the optical output or the connected fiber optic connectors when the light is turned on, so as not to cause any damage to the eyes!
NOTE: If you use batteries, it is forbidden to charge the dry batteries to avoid danger!
To keep the performance of the instrument and prolong the service life, please pay attention to the following:
- The instrument should be avoided from shock, hit, fall off and other mechanical damage
- All types of optical output port adapters should be strictly avoided from touch of hard objects, dirt, acid; alkali and corrosive substances .You should cover the dust proof cap when it is not in use. Beware of dust or other harmful chemical erosion.
- Usealcohol to clean theceramic corefiber jumperend. You cannot use it until the alcohol is dry.
- When the instrument is being operated, do not look at the output end of laser instrument directly to avoid eyes or skin from being burnt
- Clean the ceramic core regularly
- Please take the battery out if it is not used for long time to increase the battery life.
- Must use the charging adapter supported by the model of instrument
Faults & Solutions
| Faults | Reasons | Solutions |
| Cannot turn on the tester | Low voltage of battery | Charge the battery |
| Big test error | Sensor interface is dirty | Clean the sensor interface |
| Open light source but no optical power outputs. | Connector ceramic core damage | Change connector |
| Light source power becomes smaller | Connectors, internal laser fiber ceramic core are dirty | Clean the ceramic core with cotton dipped in alcohol |


