Description
Overview
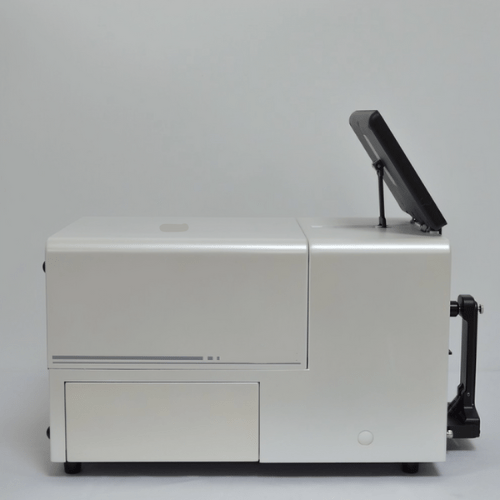
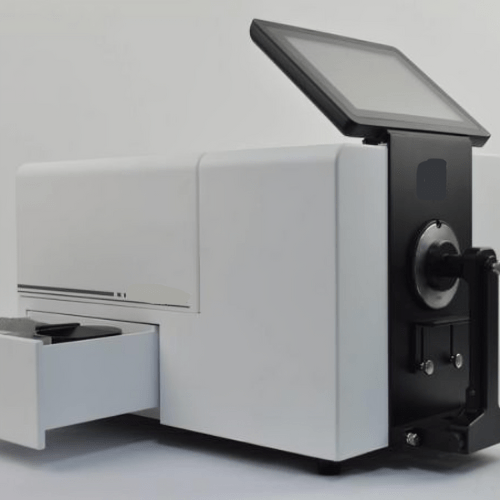
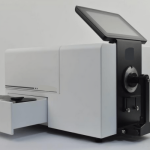
GAOTek high accuracy benchtop automotive colorimeter is a highly stable benchtop spectrophotometer; the newly upgraded auto-calibration technology ensures excellent stability of the instrument for long-term use and measurement, even in the case of drastic environmental changes. Benchtop spectrophotometer has two illumination sources: pulsed xenon lamp and led; with 24 standard light sources and 40+ measurement indicators, it can simulate and calculate colour data under various light sources and colour indicators.
Features
- Automatic calibration
- Excellent long-term repeatability, even after environment changes
- It has two lamps: pulsed xenon and LED
- 24 kinds of illuminants and more than 40 measurement indices
- Temperature and humidity compensation function
- Seven -inch touch screen, Android operate system
- Dual optical paths spectrum analysis technology
- Support SCI + SCE simultaneous rapid measurement
Technical Specifications
| Illumination/ Viewing System |
Reflectance d or 8 (Diffused illumination, 8 degrees viewing) Simultaneous measurement of SCI or SCE, conform to CIE No.15, GB/T 3978, GB 2893, GB/T 18833, SO 7724 or 1, DIN 5033 Teil 7, JIS Z 8722 condition C. ASTM E 1164 ASTM-D1003-07 Transmittance d/0 (Diffused illumination, 0-degree viewing) |
| Sensor | Silicon Photodiode Array |
| Grating Method | Concave grating |
| Sphere Diameter | 5.98 in (152 mm) |
| Wavelength Range | 360 nm to 780 nm |
| Wavelength Interval | 10 nm |
| Half Width | 5 nm |
| Reflectance Range Resolution | 0% to 200%, resolution 0.01% |
| Lighting Source | Pulsed xenon lamp and LED |
| UV Measurement | Including UV, 400 nm cut, 420 nm cut and 460 nm cut |
| Measurement Time | SCI or SCE <2 s SCI + SCE <4 s |
| Measurement or Illumination Aperture |
Reflection xl AV Φ 1.18 in (Φ30 mm), LAV Φ0.71 in (Φ18 mm) MAV Φ0.31 in (8 mm) or Φ0.43 in (11 mm) SAV Φ0.24 in (6 mm) (Auto aperture size recognition) Aperture for transmission Φ0.98 in (25 mm) |
| Transmittance Sample Size |
No limit on sample width and height, thickness ≤1.97 in (50 mm) |
| Long Term Repeatability | XLAV Chromaticity value Standard deviation within ΔE x ab 0.015 68 °F to 50 °F (20 °C to +10 °C) arbitrary temperature change, white tile is measured every hour within 24 hours) |
| Repeatability | XLAV Spectrum Reflectance or Transmittance standard deviation within 0.1% XLAV Chromaticity value Standard deviation within AE x ab 0.015 x When a white calibration plate is measured 30 x at 10-second intervals after white calibration |
| Inter-Instrument Agreement |
XLAV ΔE x ab 0.2 (BCRA Series Il, Average measurement of 12 tiles, at 73.4 °F (23 °C) |
| Observer | 2° and 10 ° |
| Illuminants | A, C, D 50, D 55, D 65, D 75, F 1, F 2, F 3, F4, F 5, F 6, F 7, F 8, F 9, F 10, F 11, F 12, CWF, U 30, DLF, NBF, TL 83, TL 84 |
| Display | Reflectance and Transmittance graph or value, colour value, colour difference values, pass or fail, colour simulation colour assessment, haze, liquid chromaticity values, colour tendency |
| Colour Space | L x a x b, L x C x h, Hunter Lab, YXY, XYZ |
| Colour Index | WI (ASTM E 313-00 ASTM E 313-73, CIE or ISO, AATCC, Hunter, Taube Berger, Stensby) YI (ASTM D 1925, ASTM E 313-00, ASTM E 313-73), Tint (ASTM E 313-00), Metamerism index milm, stain fastness colour fastness, ISO brightness, R 457, A density, T density, E density, M Density, APHA or Pt-Co or Hazen, Gardner Say bolt, ASTM colour, Haze, Total Transmittance, Opacity, Colour Strength |
| Colour-Difference Formula |
ΔE x ab, ΔE x CH, ΔE x UVAE CMC, ΔE x 4, ΔE x 00, ΔE ab (Hunter), 555 hue classification |
| Storage Space | 8 GB |
| Screen Size | 7in (17.78 cm) |
| Operating System | Android |
| Power Supply | AC 220 V DC stabilized power supply |
| Accessories | Power adapter, data cable, transmission fixture, software USB flash disk, black cavity, white board, green board, 0% calibration shading cover (820 n attached), 1.18 in (30 mm) diameter board, 0.71 in (18 mm) diameter board, 0.43 in (11 mm) diameter board. 6mm diameter board, support table, cuvette, damping handle |
| Optional Accessories | Heating transmission fixture (including control circuit), vertical support pneumatic ejector rod (including control circuit), small sample clamping accessories pull rod box, European standard plug and American standard plug Reflective cuvette support, corrosion-resistant protective plate (non-removable) fiber test box, film clamp and micro transmission clamp |
| Interface | RS-232, USB, USB-B |
| Other Function | Camera viewfinder positioning
The instrument can measure laterally, upward and downward (using accessories) Automatic temperature and humidity compensation function |
| Operating Temperature | 41 °F to 104 °F (5 °C to 40 °C) |
| Humidity Range | Below 80% 95 °F (at 35 °C), no condensation |
| Storage Temperature | -4 °F to 113 °F (-20 °C to 45 °C) |


