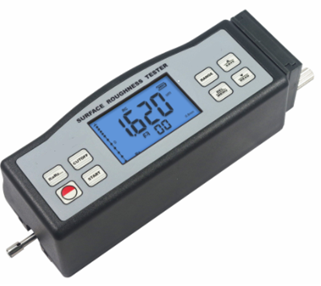
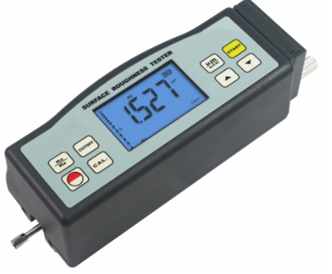
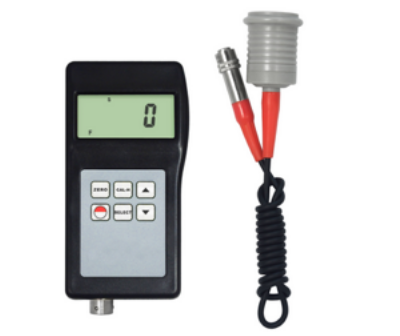
Description
Key Features
- Compatible with four standards: ISO (International), ANSI (United States), DIN (Germany) and JIS (Japan)
- Easy to operate
- Large and clear LCD display with Blue Backlight
- Multiple parameter measurement: Ra, Rz ,Rq, Rt
- Four wave filtering methods (RC, PC-RC, and GAUSS & D-P)
- Switchable between Metric (μm) and Imperial (μinch)
- Highly sophisticated inductance sensor
- Built-in Lithium-ion Rechargeable Battery and control circuit with high capacity
- Can be recharged through provided USB cable or Power Adapter
- Small in size, light in weight and easy to use
- Manual or automatic shutdown.
- Can communicate with PC computer for statistics, printing and analysing by the optional cable
- RS232 interface
- Provide Bluetooth data output device.
Technical Specifications
| Parameters | Ra, Rq, Rz, Rt |
| Measuring Range | Ra, Rq : 1.000 µin to 629.9 µin (0.025 µm to 16.00 µm)
Rz, Rt : 0.780 µin to 6299 µin (0.020 um to 160.0 um) |
| Accuracy | ≤ ± 10 % |
| Display | 0.393 in (10 mm ) 4 digits display LCD with blue backlight |
| Functional Display Value | << 6 % |
| Sensor Specification | |
| Test Principal | Inductance type |
| Probe Pin Radius | 5 µm |
| Material of Probe Pin | Diamond |
| Probe Measurement | 4 mN (0.4 gf) |
| Probe Angle | 90 ◦ |
| Vertical Radius of gun | 1.88 in (48 mm) |
| Driving Stroke | 0.7 in (17.5 mm) |
| Cutoff Length | 0.009 in/ 0.31 in/ 0.098 in (0.25 mm/ 0.8 mm / 2.5 mm) |
| Evaluation length | 1 to 5 L |
| Resolution | 0.001 µm /0.01 µm/0.1 µm |
| Data Memorize | 7 groups |
| Power | Li-ion Battery |
| Driving Speed | Sampling length = 0.009 in (0.25 mm) Vt=0.135 mm/s |
| Sampling length = 0.31 in (0.8 mm) Vt=0.5 mm/s | |
| Sampling length = 0.098 in (2.5 mm) Vt=1 mm/s | |
| returning Vt=1 mm/s | |
| Dimension | 5.5 in x 2.2 in x 1.9 inch (140 mm x 52 mm x 48 mm) |
| Weight | 14.82 oz.(420 g) |
| Humidity | < 80 % |
| Operating Temperature | 0 ◦F to 122 ◦F (0 ◦C to 50 ◦C) |
Additional Information
How it works:
When measuring the roughness of a surface, the sensor is placed on the surface and then uniformly slides along the surface by driving the mechanism by the sharp built-in probe. This roughness causes displacement of the probe which results in change of inductive amount of induction coils so as to generate analogue signal, which is in proportion to the surface roughness at output end of phase-sensitive rectifier. The exclusive DSP processes and calculates and then outputs the measurement results on LCD. It can be used for many years with its unique ruggedness feature, if proper operating techniques are followed.
FRONT PANEL DESCRIPTIONS

Key Description:
3-1 Cutoff
3-2 Parameter
3-3 Display
3-4 Power
3-5 start key
3-6 Range
3-7 up/Save key
3-8 down/Read key
3-9 Delete/menu

Description:
3-19 Filter
3-20 Calibration
3-21 Measurement
3-22 Position pointer
3-23 Browsing
3-24 Memory
3-25 Parameters
3-26 Battery
3-27 Unit
3-28 Cutoff
3-29 Ranges
Installation and unloading of sensor
- To install, hold the main part of the sensor by hand, push it into connection sheath at the bottom of instrument and then slightly push to the end of the sheath. To unload, hold the main part of sensor or the root of protective sheath and slowly pull it out.
- The probe of the sensor is the main part of the instrument which requires close attention.
- During installation and unloading, the probe should not be touch in order to avoid damage which can affect measurement results.
- Connection of the sensor should be reliable during installation.
Power adapter and charging of battery
When the battery voltage is too low (which is indicated by the battery symbol on the screen), the instrument should be charged as soon as possible. Follow the indications as shown in the figure. The power adapter should be plugged into the power socket of the instrument. The power adapter should be connected to 100 ~ 220 V 50 Hz and charging of the battery will begin. Input voltage for power adapter is AC 100 ~220 V with DC 5~7 V of output, about 300 mA of charging current, charging time of up to 5.0 hours. This instrument uses a lithium ion chargeable battery Charging can be fulfilled at any time without affecting the normal operation of the instrument.


- Layout of connection lines should not affect measuring Part while charging.
- The meanings of battery indicators are: If battery voltage is normal, measurement can be carried out .The black part inside prompt shows capacity of Battery
 ; Indicates too-low voltage and battery should be charged as soon as possible;
  indicates that battery is full.
 - Relative high noises of the power source can affect measurement to weak signal to some extent when battery is being charged.
- The instrument needs to monitor the process of charging so that it is not necessary to turn it off. The instrument will turn on automatically even when switched off.
Measuring Procedure:
Preparations for measurement
- Switch on to test if the battery voltage is normal.
- The instrument automatically restores conditions of the last measurement before it is turned off since these conditions are automatically stored.
- To check if the cutoff length selected is right. If not, depress the “CUTOFF” key to select.
- To check if the evaluation length selected is right. If not, depress the “RANGE” key then select “Up/Save” key or “Down/Read” key to select. To save and quit, just depress the “RANGE” key again.
- To check if the profile filter selected is right. If not, depressing the “DEL/Menu” key and not releasing it till ‘Fil T’ on display. It takes about 4 seconds from starting pressing the “DEL/Menu” key and then pressing the “Up/SAVE” key or “Down/read” key to cycle between RC, PC-RC, GAUSS, and D-P or vice versa. To quit just press any key other than the “Up/SAVE” key or “Down/read” key.
- To check if the measurement unit selected is right. If not, just press the “DEL/MENU” key and not releasing it till ‘UNIT’ on the display. It takes about 8 seconds from starting depressing “DEL/MENU” key. Press “UP/SAVE” key or “Down/Read” key to switch between the metric system and the British system. To quit just press any key other than “Up/SAVE” key or “Down/read” key.
- To check if the parameter selected is right. If not, depress the key “Ra/Rz” key to select. This step is very important.
- To clear the surface of the part to be measured;
- Place the instrument correctly, stably and reliably on the surface to be measured.
- The sliding trail of the sensor must be vertical to the direction of process line of the measured surface.
- Adjustable leg and sheath of sensor
When the measured surface of the part is smaller than the bottom surface of the instrument, the sheath of sensor and adjustable leg can be used for auxiliary support t to complete measurement.

4-1 Roughness tester
4-2 Sheath of probe
4-3 Item to be measured
4-4 working table
4-5 Adjustable leg
Measuring:
After preparations is done, just press Start key to measure. If measuring conditions are not to be changed. Firstly, you will see the display and the probe is'—' moving forward and sampling. Then you will see the probe stop sliding and move backward. The measurement result shows on the display after the probe stop moving.
Save the measurement results to the tester for later use
After measuring, you will see the original ‘M’ becomes the ‘M̅’. In such a state, you can save this group of results including Ra, Rz, Rq, Rt and measurement conditions to the memory of the tester by depressing the ‘Up/Save’ key. Then the symboll ‘M̅’changes to ‘M’ automatically while the number of memorized groups increases 1.
How to browse the different parameters
In ‘M̅’ state, you can browse different parameters. The corresponding parameter and its value show on the display once depressing the key.
Delete the measurement results
In ‘M̅’state, you can delete this group of results by depressing the ‘DEL/MENU’ key. Then the symbol ‘M̅’ changes to ‘M’ automatically. On the other hand, the new measurement results will replace the old ones if you press the Start key in ‘M̅’ state.
How to Browse the Memorized Data
No matter in ‘M̅’ state or ‘M’ state, you can browse the memorized data by depressing the ‘Down/Read’ key. The browsing state is marked in ‘R’ on display. When in ‘R’ state, you can browse different groups by depressing the ‘Up/Save’ key or ‘Down/Read’ key. The serial number of the group shows on the display. For each group, you can still browse different parameters. The corresponding parameter and its value show on the display once depressing the key![]() .
.
How to Calibrate the Tester
- To enter the calibration state, just depress the ‘DEL/Menu’ key and not releasing it till ‘CAL’ on the display. It takes about 12 seconds from starting depressing ‘DEL/MENU’ key. The calibration state is marked by ‘CAL’.
- Take a measurement based on the Standard sample plate. Contrast the measuring value with the value of standard sample plate based on the same parameter.
- Depress the key ‘Up/SAVE’ key or ‘Down/READ’ key to adjust the reading to the standard value.
- Repeat the steps till the accuracy is okay.
- To quit, just press any key other than START key.
- The instrument has been thoroughly tested before delivery to ensure that the display value error is less than ±10%. The user is recommended not to use the Calibration function too often.
How to Restore the Factory Settings
When to restore
It is necessary to restore the factory settings when a new probe is installed or the tester could not measure any more.
How to restore
Just depress the ‘DEL/MENU’ key and do not releasing it till ‘FAC’ on the Display. It is about 16 seconds from starting depressing ‘DEL/MENU’ key. This state is also marked by CAL’, also there will be a jumping reading on the display after 3 seconds, press any key except the power key to exit.
If the testing reading is still not correct after the factory settings, you have to calibrate the tester again.
COMMUNICATE WITH PC
- Install the optional RS232C software to the PC.
- Connect the tester to the COM port of the PC with the optional RS232 cable.
- Run the software on the desktop and select the COM port in the system settings.
- Click the button of data collection, then click the button of Begin/Continue.
- To download the groups stored in the Memory, just press the ‘Down/Read’ key.
Central line
This tester adopts minimum central line of Least Square Algorithm.
Recommended Cut-off length:

GENERAL MAINTENANCE
- Avoid crashes, intensive vibration, heavy dust, humidity, grease stains and strong magnetic fields.
- The sensor is a precise part and should be protected carefully. It is recommended to put it back in the box after each operation.
- Protect the standard sample plate belonging to the instrument carefully to avoid calibration faults caused by scratches.


