Description
Overview
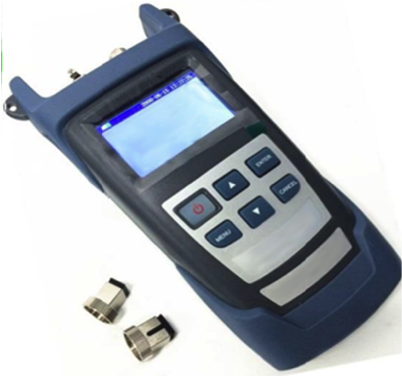
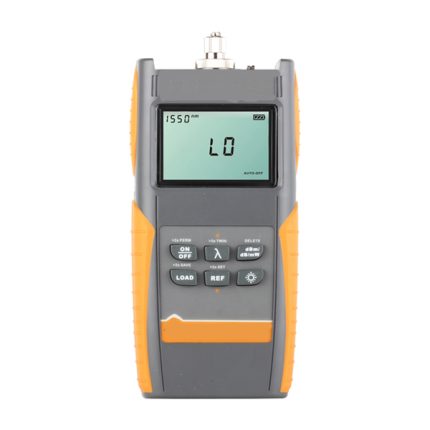
The GAOTek Fiber Optical Multimeter provides a wide range of optical power measurements for one to four wavelength laser ranges with stable output. It can provide a single 650 nm visible red light, dual-wavelength 1310 nm and 1550 nm laser output using single-mode fiber, or provide 850 nm/1300 nm/1310 nm/1550 nm four wavelength laser output. This is an ideal test instrument which comes with an automatic shut-down feature, wide range of optical power measurements, and a general interface design. Additionally, both linear (mW) and non-linear (dBm) indices display on the same screen. It is an useful device for maintenance of fiber optic networks.
Key Features
- Handheld, easy to use device.
- User Self-calibration
- Rechargeable lithium battery used to reduce user costs
- Linear (mW) and non-linear index (dBm) display on the same screen
- Can set the automatic shut-down function
- High stability multi-wavelength single and multi-mode laser output, CW mode or modulated mode
- Color LCD display
- Data can be uploaded to PC
Technical Specifications
| Power Meter Parts | ||||||||
| Measurement Range | -70 dBm ~+3 dBm or -50 dBm ~+26 dBm | |||||||
| Type of Probe | InGaAs | |||||||
| Range of Wave Length | 800 nm ~1700 nm | |||||||
| Uncertainty | ±5 % | |||||||
| Standard Wave Length | 850 nm, 980 nm, 1300 nm, 1310 nm, 1490 nm, 1550 nm | |||||||
| Resolution | Linear indication: 0.1 % Logarithmic indication: 0.01 dBm | |||||||
| Connector | General Setup: FC/PC SC/PC
Other Setup: LC/FC/SC/ST Many common interface |
|||||||
| Light Source Parts | ||||||||
| Type | A | B | C | D | ||||
| Working Wavelength | 650 nm red light source | 1310 nm/1550 nm | 1310 nm/1550 nm +
650 nm red light source |
Light Source
(1310 nm/1550 nm/1625 nm) |
||||
| Others: customized by the customer | ||||||||
| Light-Emitting Device | FP-LD | |||||||
| Optical Output Power | -7 dB/-7 dB | -7 dB/-7 dB red light source: 1 mW | 0 dB-7 dB | |||||
| Modulation | CW/270/1 K/2 K | |||||||
| Type of Optical Fiber | SM, MM | |||||||
| Connector | FC/PC | |||||||
| Multi-Mode Output Power | ≥–20 dBm | |||||||
| Others | ||||||||
| Resolution | Linear indication: 0.1% Logarithmic indication: 0.01 dBm | |||||||
| Working Temperature | 3.2 °F ~ 140 °F (-16 °C ~ 60 °C) | |||||||
| Storage Temperature | -13 °F ~ 158 °F (-25 °C ~ 70 °C) | |||||||
| Auto Power-Off Time | 10 min | |||||||
| Continuous Working Hours | more than 15 hours | |||||||
| Display | 2.4” TFT color LED with backlight | |||||||
| Dimensions | 7.48 in* 3.93 in* 1.88 in
(190 mm*100 mm*48 mm) |
|||||||
| Power Supply | Rechargeable lithium battery | |||||||
| Weight | 0.61 lbs. (280 g) | |||||||
Additional Information
Function keys
![]() Power on/off or Auto-shutdown set
Power on/off or Auto-shutdown set
![]() Exit the current operation without save
Exit the current operation without save
![]() Function selection, data increase
Function selection, data increase
![]() Function selection, data decrease
Function selection, data decrease
![]() Enter the menu or select the current operation
Enter the menu or select the current operation
Operating Instructions
Power On: Press ![]() to power on, and then will display the following interface
to power on, and then will display the following interface
Power Off : When the meter is power on, press ![]() for 2 seconds to power off.
for 2 seconds to power off.
Meter Set-up

- Enter the setup interface
- Select meter setup
- Press ENTER, and display the following interface
- Press MENU to select function, for example, select light source wavelength.
- Press
 or
or  to select sub item, for example: select wavelength as 1490 nm.
 - Press
 to save setup and return to setup interface
 - Press
 to cancel, and return to setup interface.
Language
- Enter the setup interface, select language, press
 and display the following interface.
 - Press
 or
or  to select function item Return to setup interface and set language of your option.
Date and Time
- Enter the setup interface, select time, press
 and display the time set interface
 - Press MENU to select item or
 to
to  value, Press
  to apply and return to setup interface.
 - Press
 to cancel and return to setup interface, after pressing
  , if the time is incorrect, cursor will focus on the error. Only correct format of time is considered.
 - Press MENU at main interface, press
 or
or  to move cursor, select file item
 - Press
 to enter file interface, and display the following interface.
Saving the Document
- Press
 or
or  to move cursor, to move command item cursor. When command cursor is on “lookup”, Press
  to view current file results.
 - When command cursor is on “prev” or “next”, press
 to page up or down.
 - There are “delete”, “empty” commands and so on.
Calibration settings
Calibration settings are used to set the Offset size. Displayed value is the overall power to add a value.
- Enter the setup interface, select Calibration item, press
 to enter Calibration interface.
 - Press MENU to select items. Press
 or
or  to increase or decrease value by 0.01. When selected item is “save”, press
  to apply.
 - When selected item is “default”, press
 to restore to default.
Data upload
Measurement results can be stored in the instrument, or stored in the instrument through the host computer.
As long as the data line of a termination on the local PC Link interfaces, the other side access to PC-USB port, open the PC software, PC software by default settings, and then upload directly to the PC point, the data can be reached the PC.
Maintenance and Precautions
- Don’t watch the output port with eyes while it is running, the laser will hurt your eyes
- If you are not going to use the tester for long time, cover the dust-proof cap immediately to keep the end clean, don’t expose it in air for long time, otherwise dust may gather polluting the output end.
- After the stabilized light source works for a time, dirt or dust may gather at output end reducing output optical power, if so, user can gently wipe the surface using cotton swab dipped with alcohol, then remove the contaminants with dry cotton swab. If end still look dirty after doing so, please contact us
- For any other fault, please immediately contact our technician, don’t open the cabinet of the device to repair it by yourself, otherwise more serious problems may occur. We will not repair any product that have been disassembled by user himself
Trouble Shooting
| SI No | Diagnosis | Solution |
| 1 | Output light is found unsteady | Please recharge the battery |
| 2 | The terminal of adapter is dirty | Clean it gently with alcohol |
| 3 | The output optical power is unsteady after start-up | Pre-warm the device for 15 minutes before using it. |
Standard Accessories
- Main Body
- Rechargeable lithium battery (in the battery cartridge)
- Warranty card
- User Manual
- Pass Certificate
- Soft carrying bag
- Charger
- Cleaning rod


