Description
Overview
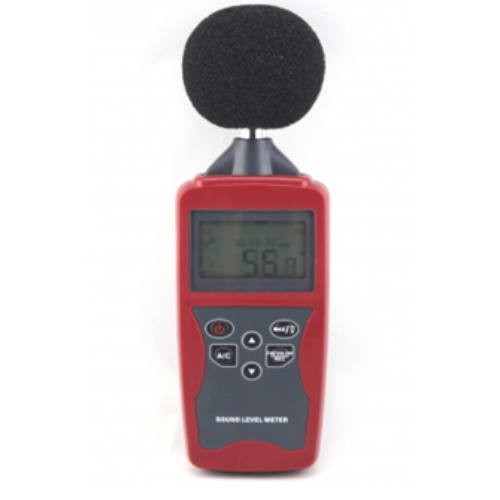
GAOTek Sound Level Meter with Pressure Level (Exposure Level) is designed to measure noise levels from 30 dB to 130 dB and can be widely used in noise control projects and quality control. Some of the features of this lightweight device include backlight display, alkaline battery, LCD with 4 digit display, over range indicator, and 1/2 in polarization capacity microphone.This instrument is portable and durable and is comfortable for single hand operation. It complies with JJG188-2002, IEC61672-1:2002 type 2 standards.
Key Features
- Measuring parameters:
Sound pressure level (Lp),Equivalent continuous sound pressure level (Laeq),Sound exposure level (LAE),Peak sound level (LCpeak) - 4 digits LCD with back light display.
- Over range indicator.
- Max value hold.
- Data holding.
- Highly cost-effective.
- It is simple and easy to use.
Technical Specifications
| Standards | JJG188-2002
IEC61672-1:2002 type 2 |
| Microphone/ Sensor | 1/2 in polarization capacity microphone |
| Range | A – weighing: 30dB ~ 130dB |
| C – weighing: 35dB ~ 130dB | |
| Manual Range | 30-80 dB, 50-100 dB, 60-110 dB, 80-130 dB |
| Frequency Weighing | A/C |
| Dynamic indicator range | 50 dB |
| Frequency range | 31.5 Hz to 8 kHz |
| Accuracy | ± 1.5 dB (at 94 dB, 1 KHz) |
| Time weighing characteristics | Fast (F); Slow (S) |
| Data recording | 10 |
| Resolution | 0.1 dB |
| Sampling Rate | 1 second |
| Bar graph | 1 scale for 1 dB, 125 ms |
| DC output | 0 ~2.5 V, 25 mV/dB |
| Power supply | 1x 9.0 V, 6F22 batteries (Adaptor : DC 9 V 100 mA ) |
| Display | LCD with 4 digits |
| Dimension | 8.6 in × 2.8 in × 1.3 in (220 × 73 × 35 mm) |
| Weight | 10.2 oz. (290 g) |
| Operating Humidity | 10 % ~ 80 % RH |
| Storage Humidity | 10 % ~ 70 % RH |
| Operating Temperature | 32 °F ~ 104 °F (0 °C ~ 40 °C) |
| Storage Temperature | 14 °F ~ 140 °F (-10 °C ~ 60°C) |
Additional Information
Meter Description:

- Capacitance Microphone
- LCD Screen
- Power button
- Max/backlight
- Button for higher range
- A/C Switching
- Fast/ Slow and manually recording
- Button for lower range
- Jack for adaptor
- DC output jack
- Calibration potentiometer
- Holder
- Tripod mounting screw hole
- Battery cover
- Protection cover
- Wind screen (used in windy conditions)
LCD Display:

- Measuring Range
- Calendar (Year, Month, Date) and time
- Recording
- Sound Pressure (Lap, LCp, Laeq, LAe, Lcpeak)
- Battery Indicator
- Memory Full
- Measuring Value
- Noise Unit: dB
- Bargraph: dynamic indicator of the noise (1 for 1 dB)
- Over Range Indicator: displayed when the measured source is under the Min value of the selected range.
- Data Holding
- Max Value
- Time Weighing: Fast
- Time Weighing: Slow
Button Operations:
Power Button ![]()
- Switch on: Install battery, press the symbol
 . All elements will be displayed quickly and be ready for measurement. The default measuring range is 30 – 80 dB.
 - Switch off: Meter automatically goes off after 10 minutes without any operation or press
 manually
Max/ Backlight ![]()
- Press
 at any time, backlight will be switched on.
 - Long press it, the MAX function is activated and it displays only the Max value.
- The display updates each time a higher reading is encountered.
- Press
 again to get back to normal measuring mode.
Button for higher range/ Button for lower range “▲▼”
The keys are used to choose measuring range. The selectable range is 30 dB – 80 dB, 50 dB – 100 dB, 60 dB – 110 dB, 80 dB – 130 dB. The default range is 30 dB – 80 dB.
Switch “A/C”
- Press A/C to switch frequency weighing between A and C; the parameters will switch between LAP, LCP, LAEQ, LAE and Lcpeak. These icons will be indicated on the display one by one. With “A” weighing selected, the device responds like a human ear (boosting and cutting the noise amplitude over the frequency spectrum). “A” weighing is used for environmental measurements, OSHA regulatory testing, law enforcement and workplace design.
- Press “C” weighing for flat response measurements (no boost or cut). “C” weighing is suitable for thee sound level analysis of machines, engines, etc. Most OSHA related testing is performed using “A” weighing and “Slow” response time settings.
Fast/ Slow and Manual Recording ![]()
- Select “FAST” to capture noise peaks and noise peaks and noises that occur very quickly. In “FAST” mode, the meter responds in 125ms.
- Select “SLOW” mode (meter responds in 1s) to monitor a sound source that has a reasonably consistent noise level or to average quickly changing levels such as the sound of printer, photocopier, etc.
- Selection of Fast or Slow is determined by the application and any directives or standards related to that application.
Pre-operation:
- Install a 9.0V battery.
- Replace a new battery, if low battery symbol is shown on display.
- When using DC adaptor, insert it into the adaptor jack at the bottom of meter.
- Set the time and date.
NOTE: Press the backlight key and the power key together, enter the mode of time and date setting, press backlight key to confirm the setting.
Operation:
- Switch it on with the
 key.
key. - Adjust it to the appropriate measuring range till “UNDER” and “OVER” disappear.
- Select the frequency weighing A or C.
- Select the time weighing: Fast or Slow.
Data recording and delete:
Data recording: Long press FAST/ SLOW/ REC, RECORD indicates on the display, the data recording function is activated, press it again and record the current reading, time and measuring mode. “FULL” icon displayed if the records reach to 10.
Press FAST/SLOW/REC to display the recorded data, when “CAL” appears, the first memorized data will be displayed. Use “▲▼” to browse more data.
“—”Symbol is indicated when there is no record available.
NOTE: Data delete: long press “A/C” button when “CL” appears, all the records will be deleted.
Avoiding the measurement error:
- Factor1- Human Body
Experiments show that human body and the housing of the device could affect the measurement accuracy by blocking or reflecting the sound signal. The difference can reach to 6dB, for the measurement taken within 1m from human body while the frequency is 400Hz. The difference could be smaller under other frequency. It is strongly recommended that the device should be 30cm away from human body, 50cm would be even better. - Factor2 – Absolute Pressure
The measurement will slightly be affected by the absolute pressure result from different altitude too. Please refer to the following information to make necessary revise for the measuring results (Add the corresponding compensation value to the reading, for example, if the altitude is 500m, the correct measurement should be the reading plus -0.1).
Recalibrate the device every time before use it on a different altitude can avoid the error. Please refer to specification table, for the calibration details.
| Altitude (m) | Pressure (mbar) | Compensation (dB) |
| 0 – 250 | 1013 – 984 | 0.0 |
| > 250 – 850 | 983 – 915 | -0.1 |
| > 850 – 1450 | 914 – 853 | -0.2 |
| > 1450 – 2000 | 852 – 795 | -0.3 |
Safety:
Operate the meter properly, for its intended purpose and within the parameters specified in the technical data.
Ambient Condition:
- Altitude: < 2000 meters
- Relative humidity: <= 80% RH
- Temperature: 32 °F ~ 104 °F (0 °C ~ 40 °C)
- Only for indoor use.
Storage and maintenance: Take the meter to the professionals if the necessary repair is not specified in the instruction manual. Clean it with a dry cloth, always keep it dry.
Calibration:

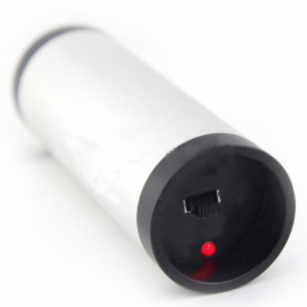
- Use calibrator of 94 db @ 1 KHz.
- Ready the meter for calibration: Frequency Weight: A, Time Weight: Fast, Range: 50 db – 100 db, inactive Max function.
- Fix the microphone into the calibrator carefully.
- Switch on the calibrator, if it does not display 94; adjust the potentiometer covered by the QC sticker on the back of the housing, till the meter displays 94.
Note: The meter has already been factory calibrated; it is strongly recommended calibration to be taken once a year.
General Maintenance:
NOTE: Do not use it at places with high temperature and humidity.
- Take out the battery if the meter is not going to be used for a long time.
- The sound signal of the measured object received by the microphone can be mixed by the sound signal of the wind, therefore, cover the microphone with the wind screen in windy conditions.
- Avoid crashes, intensive vibration, heavy dust, humidity, grease stains and strong magnetic fields.
- The sensor is a precise part and should be protected carefully. It is recommended to put it back in the box after each operation.


