
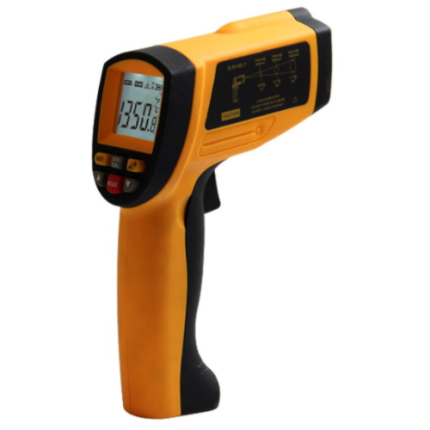
Description
Overview
GAOTek Ultrasonic Flaw Detector (Real-time Clock, Display Freeze) is designed for the hostile site environment and can be used to locate the flaws from the solid waveform display with data storage of up to 1000 data sets including waveforms, curves and parameters(including the traditional 1000 channels). Data communication can be performed using RS232 interface to transmit waveforms and data so as to manage the result of detection on the computer, and generate the flaw detection reports, as well as print out reports. It supports the Real-time clock automatically record the date and time of the stored waveform. This Ultrasonic Flaw Detector has unique Omni seal design enables it to resist the damp, sandstorm, dust, and pollution in all sorts of environmental extremes ranging from ocean to desert.
Features
- Pan-seal design, including tool housing, battery case, fastening screws, and external interface.
- Working frequency range from 0.5 MHz to 15 MHz
- Surface of the casing is antiskid with eroded textures
- Damping can be changed among 4 levels: 33 Ω/50 Ω /100 Ω /500 Ω.
- Two battery schemes – innovative high power lithium batteries of notebook style or 6 ordinary LR14 batteries
- Full screen function
- True color TFT LCD
- Solid waveform display
- Perfect DAC curve functions
- 2 independent measurement gates, monitoring the echo amplitude and the sound path distance.
- Bulk storage of up to 1000 data sets
- Echo-echo thickness measurement
- Real-time Clock function
- RS232 Interface used for data communication.
- Easy to use
- Squared ultrasonic pulse generator with changeable width and scope is initiative domestically.
Technical Specifications
| Working Frequency | 0.5 MHz to 15 MHz |
| Standard | IP67 |
| Sound Velocity of the Material | 1000 m/s to 9999 m/s |
| Detection Coverage | 0 in to 177 in (0 mm to 4496 mm) |
| Operation Mode | Pulse echo, double crystal |
| Pulse Shift | 0 in to 39.37 in (0 mm to 1000 mm) |
| Probe Zero | 0 µs to 199.99 µs |
| Display | 5.7 in (14.48 cm) TFT LCD screen |
| Gain Control | 0 dB to 110 dB, 0.1 db, 1 db, 2 db, 6 db stepping |
| Reject Scope | 0 % to 80 % (adjustable) |
| Vertical Linearity Error | ≤ 3 % |
| Horizontal Linearity Error | ≤ 0.3 % |
| Resolution | ≥ 32 dB |
| Dynamic Range | ≥ 30 dB |
| Sensitivity Excess | ≥ 55 dB ((0.78 in (19.8 mm), deep ɸ 2 flat bottom hole)) |
| Average Noise Level | ≤ 10 % |
| Data Storage | 1000 data sets |
| Battery Type | Lithium battery or LR14 batteries (6) |
| Battery Working Hours | 8 hours |
| Power Supply | 220 V AC, 12 V DC |
| Dimension | 10.63 in × 7.48 in × 2.36 in (270 mm × 190 mm × 60 mm) |
| Weight | 3.09 lbs. (1.4 kg) (without batteries) |
| Operating Temperature | 14 °F to 122 °F (-10 °C to 50 °C) |
Additional Information
Standard Configuration:
- Ultrasonic flaw detection – 1
- Recharger -1
- Probe Line -2
- Instrument case-1
- Communication software-1
- Lithium battery-1
- Communication cable-1
- Normal Probe/ Angle beam probe- 1 each
- Strap -1
- Quality Certificate
- User manual
- Warranty card
Names of the Major Components of the Instrument
The names of the major components of the instrument are
- TFT True Color Display
- Touch Keypad
- D Ring
- Hand Strap
- Rotatable Stand
- Power Adapter Port
- Communication Port
- T/R Probe Cable Port
- R Probe Cable Port
Keypad
The keypad plays a role of mediator in the dialogue between human and machine. The keypad is printed in English. All the control instructions given by the user to the flaw detector are finished entirely by the keypad. With the process of the keypad operation, the instrument is able to identify various meanings of each key according to different conditions and then to carry out the instructions of the operator.
Main Menu and Functions
Functional Keys:
| Automatic gain | Increase or decrease the highest wave inside the gate to 80 % of the screen |
| Freezing | Waveform freezing |
| Wave Peak Memory | Automatically store the highest wave |
| Full screen | Full screen display |
| On/off | Switch on and off |
| Menu control keys
Up, down, left, right, Ok |
Up/down keys are used to switch among options, left/right keys are used to adjust values. |
Main Menu:
| Main Menu | Submenu | Functions |
| Basic | Gain, Compensation, Sound Velocity, Sound Path, Displacement, Scale, Reject, Wave Height Readings | Basic Parameters in Detection |
| Setting | Waveform Filling, Color Scheme, Language, Alarm, Automatic Wave Height, Date, Time, Parameter Resetting, Lighting | Basic Functions of the Instrument |
| Gate | Gate A Start, Gate A Width, Gate A Height, Gate A Mode, Display Mode, Gate B Start, Gate B Width, Gate B Height, Gate B Mode, Measurement Point | Relevant Options
Setting Gate |
| Probe | Dual Probes, Probe Zero, Probe K Value, Front Edge Length, Work Piece Thickness | Relevant Options
Setting Probe |
| Curve | DAC Echo, Gate A Start Position, RL, SL, EL | Setting of Making DAC Curve |
| Storage | Memory Number, Call Out, Storage, Deletion, Communication | Setting of Data Storage |
| Squared wave | Pulse Energy, Pulse Width, Damping, Broadband, Repeating Frequency | Match the probe perfectly |
Basic functions of the instrument
Wave peak memory: real time envelopes show the highest wave of the flaws and record the maximum value of the flaws, it is helpful to position the flaws precisely and scan the work piece quickly. With the help of envelope waveform, the quality of the flaws can be determined.
Automatic gain: automatically adjust the gain to the preset amplitude height.
Alarming function: afferent echo/echo loss alarming.
Real-time clock: automatically record and store the date and time of waveforms.
Display freezing: catch waveforms and sound path data at any moment, and the gate can be moved after freezing to measure the echo parameters.
Flaw positioning: real-time display sound path S, horizontal X, depth Y, and wave height H
Digital Reject: 0-80%, increase by 1%, unaffecting the linearity and gain.
Wave height reading: three display modes, namely relative wave height, dB difference relative to the gate, and dB difference relative to DAC curve.
Wave signal filter can be changed between 2 levels: 1-4MHz/0.5-15 MHz. Each individual advantage of narrowband and broadband filter can be achieved.
Data communication: communicate with the computer through RS-232 port to transmit waveforms and data so as to manage the result of detection on the computer, and generate the flaw detection reports, as well as print out reports.
2 independent measurement gates, monitoring the echo amplitude and the sound path distance
When using transverse wave to detect flaws, the depths of the second and third waves are automatically calculated according to the slab thickness.
Perfect DAC curve functions, the curves change along with the changes of the gain, sound path, and displacement.
True color TFT LCD whose brightness is adjustable, with many color schemes to choose free.
Operation Instructions:
Parameter Menu Functions:
Sound path:
On the sound path submenu, make the adjustment of the display range, i.e., the frequency of the echo displayed. The range is from 0.98 in to 177.16 in (25 mm to 4500 mm).
Sound Velocity
On the sound path submenu, adjust the velocity of the ultrasonic wave transmitted in the detected work piece. The range of adjustment is from 1000 m/s to 9999 m/s.
Sound velocities of some materials:
| Materials | Traverse Sound Velocity | Longitudinal Sound Velocity | Materials | Traverse Sound velocity | Longitudinal Sound Velocity |
| Copper | 2260 m/s | 4700 m/s | Organic Glass | 1460 m/s | 2730 m/s |
| Aluminum | 3080 m/s | 6300 m/s | Steel | 3230 m/s | 5920 m/s |
| Iron | 3230 m/s | 5900 m/s | Epoxy Resin | 1100 m/s | 2500 m/s |
Displacement
The displacement submenu displays the starting point of the screen. When the value is adjusted, the waveform will move horizontally. The adjustment range is from 0 in to 78.74 in (0 mm to 2000 mm).
Gain
The gain submenu enables to adjust the sensitivity of the instrument. Its unit is dB. The higher is the gain, the more sensitive the instrument is, and vice versa. The adjustment range is from 0 to 110 dB.
Compensation
Owing to the different degrees of roughness of surface of the detected object and the test block calibrating the instrument, in the practical detection, we need to increase (or decrease) the sensitivity of instrument to reduce the influence caused by the surface of the detected object. The range of adjustment is from -40 to +40 dB. The values used in the adjustment are related to the gain values.
Scale
This function enables to adjust the display mode of the screen coordinate.
Reject
Adjust to a value, the echo below the value can be cleaned. For instance, remove the structural noise of the detected work piece. The reject setting is shown by % on the screen, and the adjustment range is 0-80 %.
Wave Height Readings
Ha% – The percentage of the waveform accounting for of the screen height in windows.
dBa – The dB difference of the waveform relative gate can be shown in windows. When you use this function, you should use Gate A to catch the echoes. Otherwise, it will result in error in reading. SL In the windows, the dB difference of the quantitative line relative to DAC curve will be shown. If there is no DAC curve, then it displays SL —-.
Hint: on the parameter menu, the 8 submenus are shown on two screens – the former five ones on one screen, and the latter three ones on the other screen.
Setting Menu
Waveform Filling
This function enables to adjust the waveform displaying mode.
Color Scheme
This function is used to adjust the colors on the screen.
Language
This function is used to select the preferred language
Lighting
To set the display lighting
Alarming
To set the alarm
Automatic wave height
This function is use to set the percentage of the height of the automatic gain waveform on the screen. The default status is 80%.
Squared Wave Menu
Pulse Energy
Through adjusting the value, the sensitivity and resolution of the echo can be changed. With higher pulse voltage, the instrument shows higher sensitivity, wider pulse and weaker resolution. With lower voltage, the situation is inversed.
Pulse Width
Through adjusting the value, the sensitivity and resolution of the echo can be changed. This function aims at matching different probes and getting the highest sensitivity.
Damping
To adjust the damping of the oscillating circuit, and thereby to change the width, height and resolution of the echo display, the damping can be adjusted.
Broadband
The broadband function is to adjust the frequency of the ultrasonic wave when testing.
Repeating Frequency
The repeating frequency function is to set the detective times within the original pulse.
Gate Menu
The most outstanding feature of the digital flaw detector is the ability to display all the analogue values of echoes on the screen by digital signals. When the instrument is required to compare and compute a signal wave, “human” is needed to tell it which echo to trace. We appoint “gate” for locking the echo to be measured. The instrument handles and computes the echo inside the gate as well as displays all the data of the highest echo (including data of the sound path, the horizontal distance, the vertical distance, and the height).
The instrument works in a dual-gate mode with Gate A and Gate B. The reading mode of the gate is single gate one. The user can choose Gate A as the current gate.
Display Choice:
| Display | Meaning | Display | Meaning |
| Sa | The sound path value of the echo in Gate A | Ha | The height of the echo in Gate A |
| Sb | The sound path value of the echo in Gate B | Hb | The height of the echo in Gate B |
| ba | The path difference of the echoes in Gate A and B | Da | The vertical distance from the surface of the work piece to the flaw echo in Gate A |
| Ra | The projection distance from the probe front edge to the flaw echo in Gate A. | Db | The vertical distance from the surface of the work piece to the flaw echo in Gate B |
| Rb | The projection distance from the probe front edge to the flaw echo in Gate B | dBa | The dB difference from the echo peak in Gate A to the gate level position |
| off | Close display | dBb | The dB difference from the echo peak in Gate B to the gate level position |
Curve Menu
Owing to the diffusion and attenuation of the sound velocity, the echo heights of the reflectors of the same size depend on the distance between the reflector and the probe. The distance amplitude curve is made according to different reference reflectors which are the same size but different in their depths, and a curve diagram mode displays the influences and the changes. When the DAC curve is being made, the material of the reference block with artificial flaws should be same as the work piece to be tested.
Note: When the DAC curve is activated, adjust some parameters, the prompt line will display “a DAC curve has been made, the parameter is locked”, to change the parameter, close the DAC curve, and the DAC echo will be cleared. A new DAC curve will be made after the adjustment.
Memory Menu
Memory number:
Select the memory menu, press (up) or (down) to select the memory number submenu. Then press (left) or (right) to adjust the values.
Note:
The memory number can be chosen recurrently in the data set ranging from 1 to 1000. When setting the memory, if there is a ![]() before the data set memory number, that means the data set is occupied. If you save the data, the original data will be covered. When you adjust the memory number, press Ok to set the steps, which are divided into 1, 10, and 100
before the data set memory number, that means the data set is occupied. If you save the data, the original data will be covered. When you adjust the memory number, press Ok to set the steps, which are divided into 1, 10, and 100
Call-out
After the data set is called out, the instrument parameters will be set same as those which are stored, and they will be displayed in freeze mode of the waveform stored.
Storage
Store the current parameter setting of the instrument, DAC curve and the waveforms into the data set of an appointed memory number.
Deletion
First set the memory number, then select this option, press Ok to confirm, any other key to cancel. If there is a ![]() before the memory number, that means the data set is occupied. You can delete the set.
before the memory number, that means the data set is occupied. You can delete the set.
Communication
The flaw detector can exchange data with PC. The default status is on.
Operation of special functional keys
Freezing
The function can freeze and lock the display on the current screen. In the freezing mode, you can move the gate to measure the echoed signal frozen on the screen.
If you want to freeze the current display, press the “FREEZE” key. If you want to return the normal mode, press again the key to unfreeze.
Note: In the freezing mode, all the adjustable parameters (gain, sound velocity) cannot be adjusted.
Wave peak memory
Wave peak memory is a function that the instrument compares the “new” with the “old” highest dynamic echoes automatically and preserves the highest still echo.
First use the gate to lock the echo needed, press “PEAK MEM” key to activate the wave peak memory status.
When you move the probe, if there emerges a dynamic echo which is higher than the previous static wave displayed, the instrument can catch the new echo as the current highest echo displayed. Press “PEAK MEM” key again to exit the wave peak memory.
Full screen
Press the “FULL/SPLIT” key to enlarge the waveform display area to full screen so that you can observe the echo and the measurement values conveniently. At this moment, the main menu display is canceled. If you want to return to the normal display mode, press again “FULL/SPLIT” key
Calibration of the Angle Beam Probe
Concerning the contact detection by angle beam probe, distance calibration is a must before any detection task. There are various kinds of angle beam probes with different structures and sizes, and different detection objects require different K values, thus the sound paths in wedge blocks are not same, in other words, the front edge length of each angle beam probe of transverse wave should be measured to decide the zero-bias value. Along with the probe abrasion during the usage, the angle beam probe need recalibration after a period time of usage.
Calibration Procedures
Set the sound velocity and sound path of the material known on the parameter menu, primary echo is adopted generally.
- Calibration of the front edge of the probe.
- Calibration of the zero of the probe.
- Calibration of the probe K value (angle).
Skills of Using the Instrument
When you use the instrument to detect the work piece, it is very necessary to make full use of all sorts of powerful functions of the instrument to guarantee the accuracy of the detection and to improve efficiency.
Flexible usage of the Gate
By adjusting the start of Gate A, its width, and its height, you can use Gate A to catch the echo signal to be measured, you can also directly read the sound path, the horizontal distance, the vertical distance, and other values of the echo inside the gate on the screen.
By setting the gate mode, you can set Gate A and B as the afferent echo alarm gate and the echo loss alarm gate.
Making the best of the prompting messages on the screen during the operation process
When you operate the instrument and some operations need confirming by the operator, on the upper part of the screen displays the prompting messages.
Examples are storage, deletion, freezing, etc., when we operate the instrument, there will be corresponding prompts on the screen.
Saving and calling the instrument status and the detection parameters
The instrument is able to store 1000 sets of detection status data (including echo waveforms, DAC, etc.). Therefore, you can store the detection status data and DAC curves which are calibrated well for different probes or various work pieces into different records, and you can call out the corresponding saved record before detection. The detection can start as soon as the data are unfrozen so that you can switch among different detection statuses. It is easy for management, and at the same time, the complicated calibration work is alleviated.
Using batteries to reduce interference
When the AC mains are disturbed by the strong interference signals, you should use batteries. By using batteries, you can cut off the interference signals in the AC mains effectively, and other external interference signals will not influence the instrument. When you work in an outdoor place, you should prepare spare batteries.
Switching the display modes
In the normal display mode, press full screen, the echo display will be enlarged to the entire screen, at this point, the main menu and the submenu are hidden as shown in the figure

In the full screen mode, except the functions of automatic gain, wave peak memory, and freezing are available, other functions will be locked and unavailable. This feature is helpful to prevent maloperation when the detection is on site. If you want to return the normal mode, press the full screen again. After the instrument has been calibrated, and when you start detection, you can switch to the magnification display mode to observe the echo conveniently.
Peak value memory function
When the function is enabled, the screen will record the highest point of the echo and join all the points with dashed line to form an envelope line, when a higher echo emerges, it will refresh the memory point at this position, otherwise, it keeps unchanged.
Instrument maintenance
Use the standard connecting cables and communication cables and other accessories attached with the probes. Unmatched cables may result in electric circuit breakdown inside the instrument or cause damage to the sockets. Any liquid should be absolutely prevented from flowing into the instrument.
In the process of transporting or moving, don’t drop and hit the instrument. Strong vibration, getting wet in snow and rain should be avoided.
The outside of the instrument should be cleaned each time after operation. Then put it at a dry and ventilated place indoors.
Batteries replacement
The batteries in this instrument usually can be used for 3 years. When they don’t work, users can replace them with batteries of the same type. Please follow the steps below:
- Unscrew the battery compartment behind the main unit.
- Uncover the battery compartment and take out the failed batteries.
- Install the recharged batteries or new batteries correctly (Do not connect the wires inversely with the anode and the cathode of batteries). Please use six LR14 batteries and pay attention to the directions of the anode and the cathode.
- After the new batteries installed, turn on the power and check whether the instrument can work.
- Cover the battery compartment and tighten the screws.
Note:
Use the accumulator battery produced by our company when replacing it. If not, in the process of recharging or operating, flames or explosions may occur.
If dry batteries are used, to prevent battery leakage from causing great damage to the instrument, take them out when the instrument isn’t used.
Communication between the Instrument and the Computer
The Communication between Ultrasonic Flaw Detector (Real-time Clock, Display Freeze) and the computer and the use of data processing software
The communication function means transporting the pre-saved waveforms and related parameters in the instrument into the computer and generating flaw detecting reports, which can enable the computer to control and manage the ultrasonic defectometer. It can realize single width transfer and continuous transfer.
Connect one end of the communication cable with the communication interface. The red pot of the interface should be aligned with the red pot on the instrument. The other end of the communication cable should be connected with the COM1 (or COM2) interface on the PC. The instrument will transmit the saved graphs and data to the PC. The client software installed on PC can edit, save, or print these graphs and data.
Operating steps:
- Connect the instrument and PC with the communication cable.
- Press to enter the save menu. Use the up and down keys to select the communication submenu. Use right and left keys to turn it on. Then the instrument is ready to connect the PC.
- Open the communication software DDIclient.exe, and tap in the file scopes for download. Then press the download button.
Note:
- Pulling out the communication cable or shutting down the software during communicating will fail the communication and lead to the breakdown of the instrument.
- Restart the instrument if the communication fails. The software is programmed with C++.