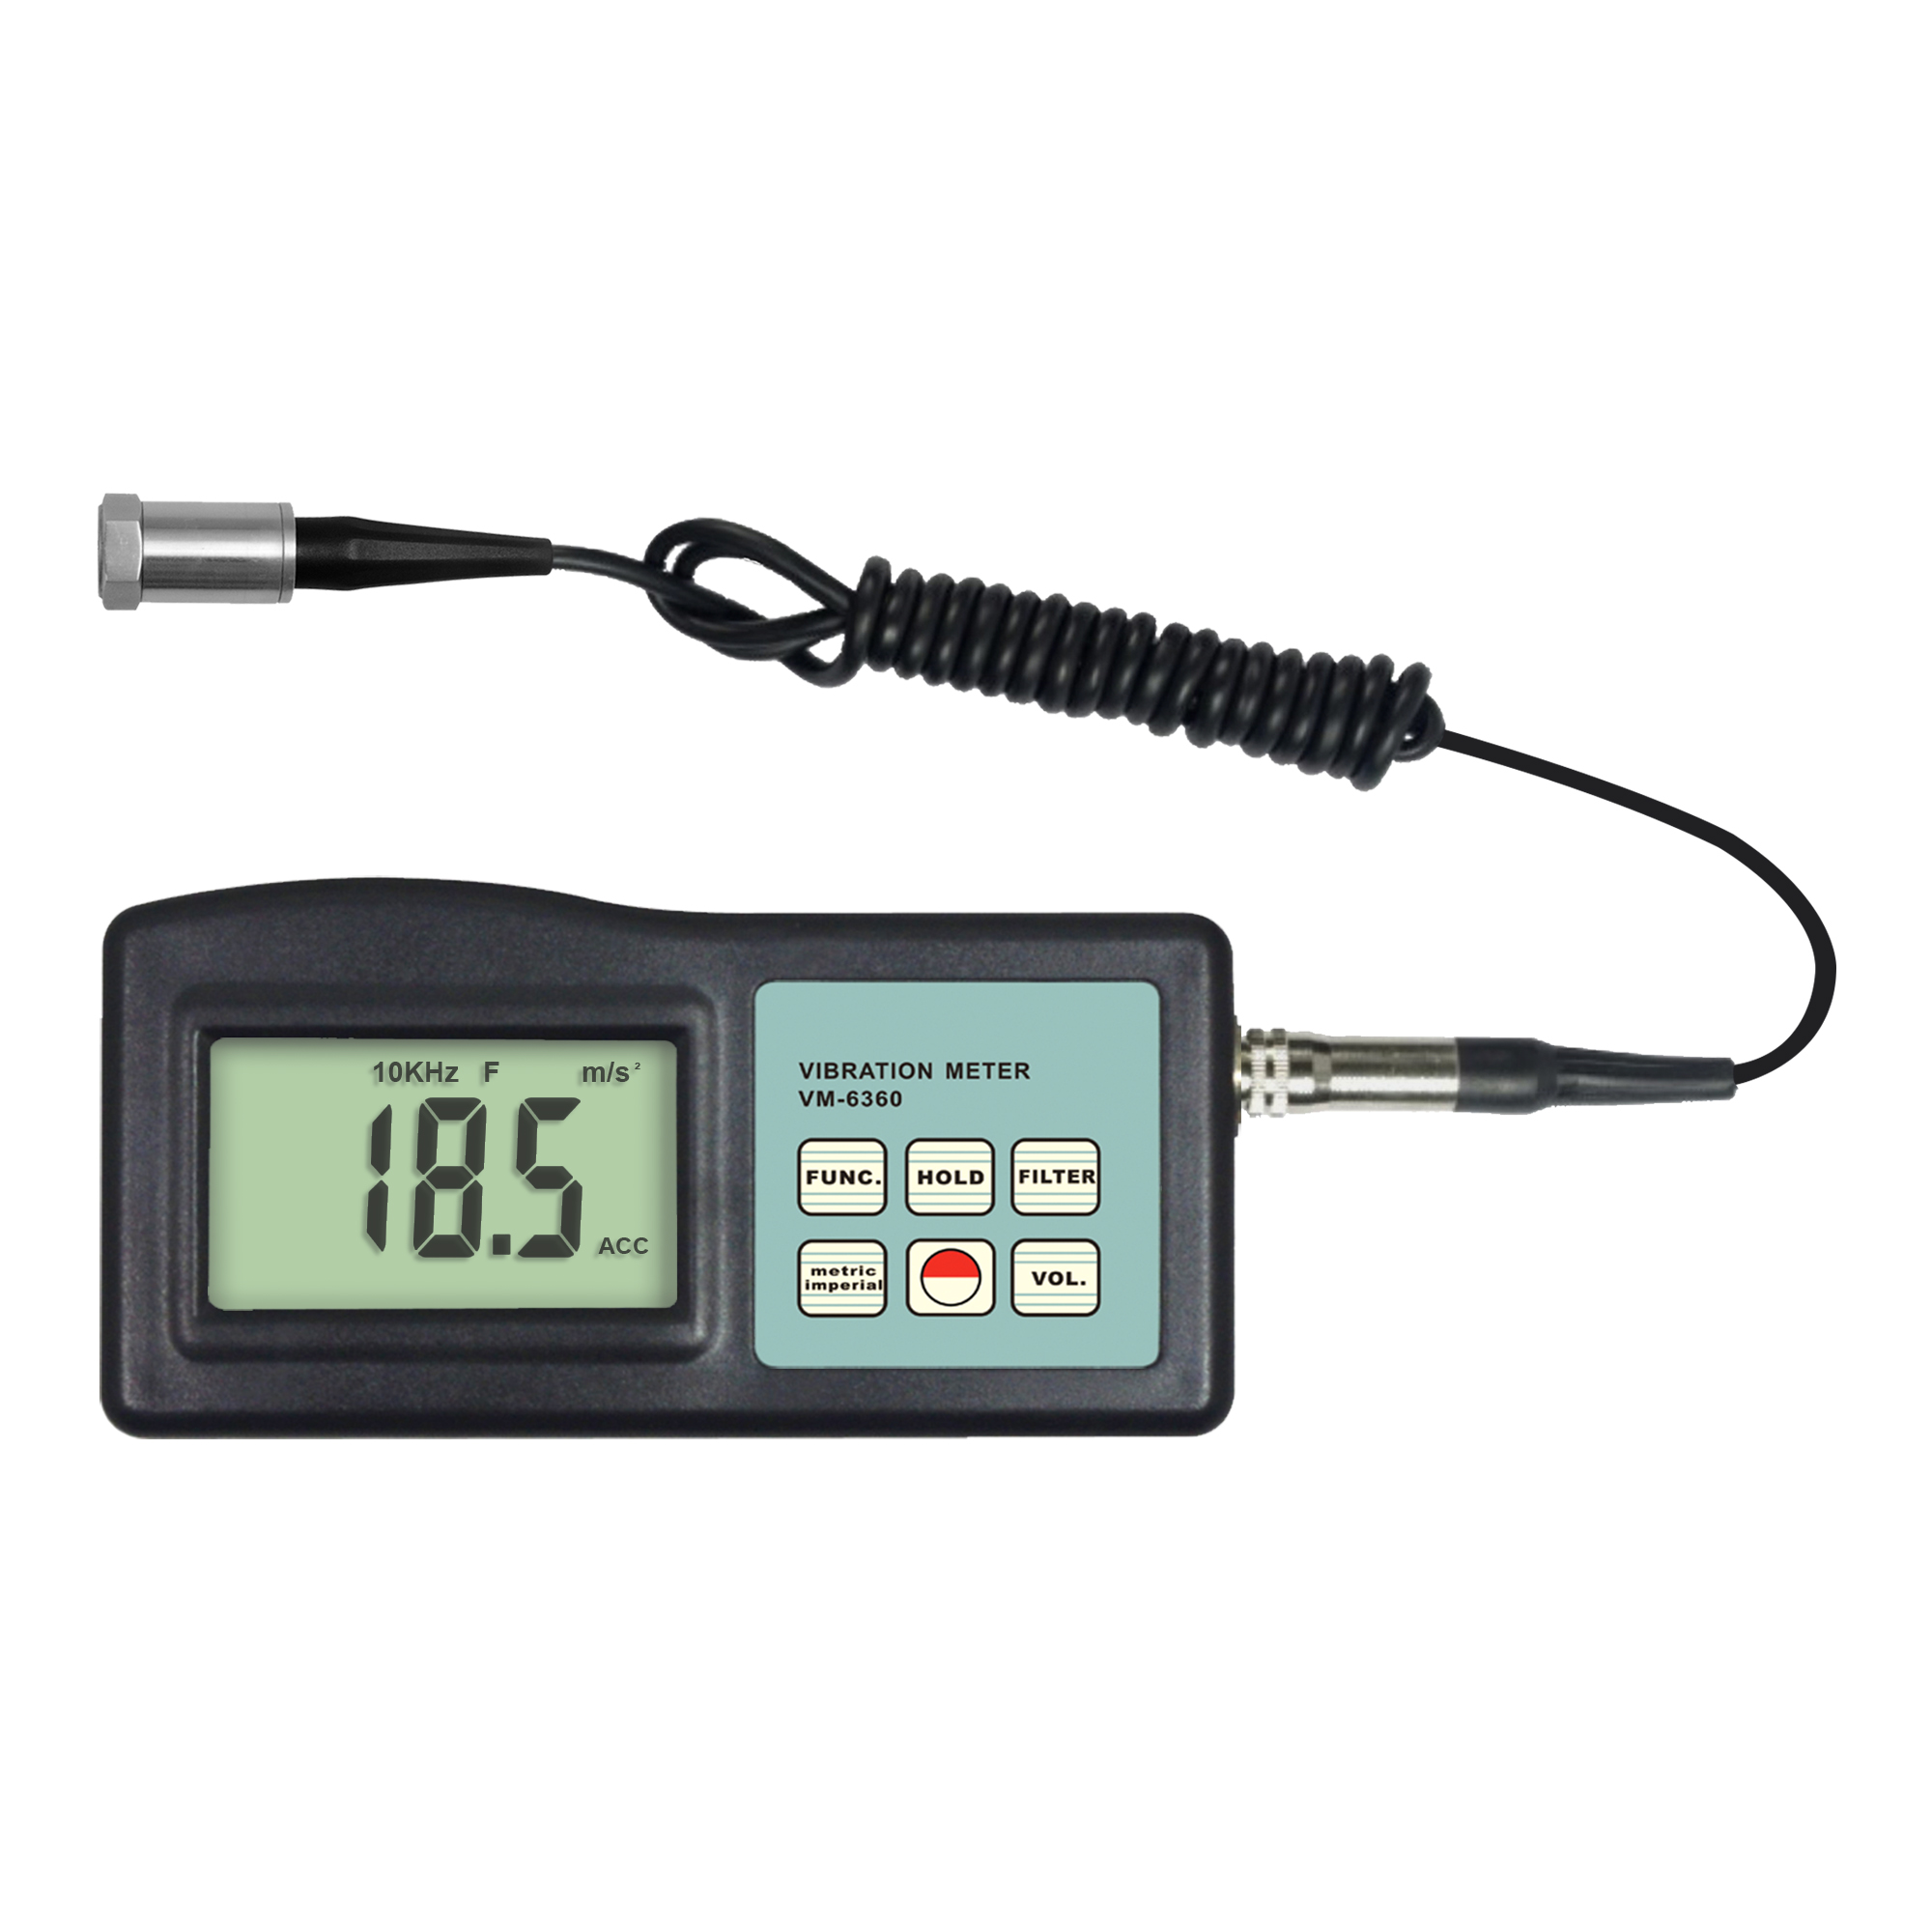
Description
Key Features
- Individual high quality accelerometer for accurate and repeatable measurements.
- Bearing condition monitoring function.
- Wide frequency range (10Hz ~ 10 kHz)
- Optional headphones for use as electronic stethoscope.
- Use USB/RS-232 data output to connect with PC.
- Provide Bluetooth data output choice.
Technical Specifications
| Sensor | Piezoelectric Transducer | |
| Display | 4 digit LCD backlit | |
| Vibration | Either one channel of X, Z or 2 channel of XZ | |
| Measuring Range | Acceleration | 0.1 ~ 400 m/s² Equivalent Peak |
| Velocity | 0.01 ~ 400 mm/s
(0.004 ~ 16.0 inch/s) True RMS |
|
| Displacement | 0.001 ~ 4.0 mm Equivalent Peak-peak | |
| Frequency Range | Acceleration | 10 Hz ~ 10 kHz |
| Velocity | 10 Hz ~ 1 kHz | |
| Displacement | 10 Hz ~ 1 kHz | |
| Accuracy | 5% of Reading +2 digits | |
| Operating Conditions | Temperature | 32 °F ~ 122 °F (0 °C ~ 50 °C) |
| Humidity | < 90% RH | |
| PC interface | RS232C | |
| Power off | 2 modes:
Manual off at any time Auto power off after 5 mins from last key operation |
|
| Power supply | 4 x 1.5 V AAA (UM-4) Battery | |
| Size | 4.9 in x 2.4 in x 1.2 in (124 mm x 62 mm x 30 mm) | |
| Weight | 4.23 oz. (120 g) (Not including Batteries) | |
| Standard Accessories | Main Unit |
| Piezoelectric Transducers | |
| Powerful Rare Earth Magnet | |
| Probe (Cone) & Probe (Spherical) | |
| Carrying Case (B04) | |
| Manual Book | |
| Optional Accessories | Headset |
| RS-232C Data Cable with Software | |
| Bluetooth Data Adapter with Software |
FRONT PANEL DESCRIPTIONS

3-1 Accelerometer
3-2 Display
3-3 Input Connector
3-4 Hold key
3-5 Power Key
3-7 Function key
3-8 Filter key
3-9 Sound key
3-10 Jack for the headphone
3-11 Jack for RS232C interface
3-12 Battery cover/compartment
MEASURING PROCEDURE
- Connect the Accelerometer to the input connector and turn it until the connector locks in position.
- Mount the accelerometer at the measurement point using the powerful magnet supplied, ensuring that the mounting surface is clean and flat, or use direct stud (M5) mounting if this is available.
- Depress the power key and release to power on the meter.
- Each time the Function key is depressed and released quickly, the meter will step to the next vibration measurement parameter with the corresponding unit showing on the display.
- Each time the Metric/Imperial key is depressed and released quickly, the measurement unit will be changed to the other measurement system.
- When several machinery or bearings are used under the same operating conditions, evaluation can be carried out by listening to the audio signals to determine changes. This method will help to locate the defective machinery or bearing quickly. Measure all machines at the same points and compare the results. The sound volume can be adjusted by Sound key 3-9. There are 8 levels from 1 to 8. Every time depressing and releasing the sound key quickly, the sound level will increase 1. The larger the sound level number, the louder the listening sound.
CONSIDERATIONS
Which Parameters should be measured?
Acceleration, velocity, and displacement are the three tried and tested parameters, which give accurate and repeatable results.
- Acceleration is normally measured in m/s peak (meters per second squared) or ft/s, has excellent high frequency measurement capabilities, and is therefore very effective for determining faults in bearings or gearboxes.
- Velocity is the most commonly used vibration parameter. It is used for vibration severity measurements in accordance with ISO 2372, BS 4675 or VDI 2056, which are guidelines for acceptable vibration levels of machinery in different power categories. These are presented as a table in section 4 of this manual. Velocity is typically measured in cm/s or inch/s RMS (centimetres or millimetres per second). Note: This instrument measures in cm/s. If you are more familiar with measurements in mm/s, or wish to compare your measured values directly with the vibration severity chart in section 4, multiply the displayed value by 10.
- Displacement is typically used on low-speed machines because of its good low frequency response, and is relatively ineffective when monitoring bearings. Units are typically mil or mm equivalent peak-peak.
An Introduction To Vibration Measurement
Vibration is a reliable indicator of the mechanical health or condition of a particular machine or product. An ideal machine will have very little or no vibration indicating that the motor, as well as peripheral devices such as gearboxes, fans, compressors, etc., are suitably balanced, aligned, and well installed. In practice, a very high percentage of installations are far from ideal, the results of misalignment and imbalance exerting added strain on supporting components such as bearings. Eventually this leads to added stress and wear on critical components, resulting in inefficiency, heat generation and breakdowns. This often occurs at the most inconvenient or uneconomical times, causing costly production downtime. As parts of mechanical equipment wear and deteriorate, the equipment vibration increases.
Monitoring the vibration of healthy mechanical equipment on an ongoing basis, detects any deterioration long before it becomes a critical problem, allowing spares to be ordered in advance and maintenance to be planned only when necessary.In this way stocks of expensive and unnecessary spares can be reduced with obvious financial benefits.
Unscheduled breakdowns result in production losses and the faulty equipment is usually repaired hastily to get production going as quickly as possible. Under these stressful conditions staffs are not always able to do repairs correctly regardless of how conscientious they are, resulting in a high probability of further early equipment failure. By implementing a predictive maintenance program with regular measurements of critical factors like vibration, downtime can not only be reduced, but planned maintenance is more effective, resulting in improved product quality and greater productivity.
What is a Trend?
A trend is an indication of the way in which a monitored vibration parameter behaves over time. If regular vibration Measurements are taken and plotted over a period of time, the resulting graph shows the progress or deterioration of a particular machine.
Typically this will have the general shape shown in the diagram below, regardless of the type of machine being considered. For a short time after installation, whether it is a new or a repaired machine, vibration levels may fall slightly as the machine is run in, followed by a long period of unchanging levels during the machine’s normal operating lifetime. A period of rising levels comes as machine parts wear out prior to failure. Such a trend enables the maintenance engineer to predict the time of failure and maximize use of the machine, while ordering spares and planning its maintenance for a time convenient to the production schedule.
BATTERY REPLACEMENT
- When the battery symbol appears on the display, it is time to replace the battery.
- Slide the Battery Cover away from the instrument and remove the battery.
- Install batteries paying careful attention to polarity.
VIBRATION STANDARDS
Rank of machine vibration (ISO 2372)
| Vibration Amplitude | Machine Sort | |||
| Vibration Velocity V rms (mm/s) | I | II | III | IIII |
| 0 ~ 0.28 |
A |
A |
A |
A |
| 0.28 ~ 0.45 | ||||
| 0.45 ~ 0.71 | ||||
| 0.71 ~ 1.12 | B | |||
| 1.12 ~ 1.8 | B | |||
| 1.8 ~ 2.8 | C | B | ||
| 2.8 ~ 4.5 | C | B | ||
| 4.5 ~ 7.1 |
D |
C | ||
| 7.1 ~ 11.2 |
D |
C | ||
| 11.2 ~ 18 |
D |
|||
| 18 ~ 28 |
D |
|||
| 28 ~ 45 | ||||
| > 45 | ||||
Note:
- “Class I” is small motor (power less than 15 kW). “Class II” is medium motor (power between 15 ~ 75 kW). “Class III” is high power motor (hard base). “Class IIII” is high power motor (stretch base).
- A, B, C, D is vibration Rank. “A” means good, “B” means satisfying, “C” means not satisfying, “D” means forbidden. Vibration velocity should be taken from the three perpendicular axes on the motor shell.
ISO/IS2373 Motor quality standard according to vibration velocity
| Quality rank | Rev (rpm) | H: high of shaft (mm)
Maximum vibration velocity (rms) (mm/s) |
||
| 80 < H < 132 | 132 < H < 225 | 225 < H < 400 | ||
| Normal (N) | 600 ~ 3600 | 1.8 | 2.8 | 4.5 |
| Good ( R) | 600 ~ 1800 | 0.71 | 1.12 | 1.8 |
| 1800 ~ 3600 | 1.12 | 1.8 | 2.8 | |
| Excellent (S) | 600 ~ 1800 | 0.45 | 0.71 | 1.12 |
| 1800 ~ 3600 | 0.71 | 1.12 | 1.8 | |
Limit of rank “N” is suitable for common motor. When the request is higher than that in the table, limit can be achieved by dividing the limit of rank ‘S’ with 1.6 or multiples of 1.6.
Maximum vibration of motor that power larger than 1 horsepower
(NEMA MG1-12.05)
| Rev
(rpm) |
Displacement
(P-P) (um) |
| 3000 ~ 4000 | 25.4 |
| 1500 ~ 2999 | 38.1 |
| 1000 ~ 1499 | 50.8 |
| ≤ 999 | 63.6 |
For AC motor, rev is maximum synchronous rev. For DC motor, it is maximum power rev. For motor in series, it is work rev.
Maximum vibrations of high power induction drive motor
(NEMA MG1-20.52)
| Rev
(rpm) |
Displacement
(P-P) (um) |
| ≥ 3000 | 25.4 |
| 1500 ~ 2999 | 50.8 |
| 1000 ~ 1499 | 63.6 |
| ≤ 999 | 76.2 |
National Electric Manufacturers Association (NEMA) establishes two standards above.


