
Description
Overview
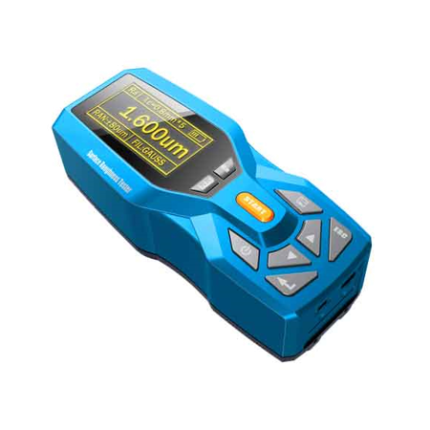
GAOTek 8 mm Color Meter with High Accuracy (Large Data Storage) is designed to analysis the best color and can store 100 standard data and 20000 sample data.This device has two kinds of color modes (CIE1976LAB, CIELCH), one color difference formula (ΔE * ab), one measuring light source (D65), and a universal measuring caliber (0.31 in, 8 mm). In addition, users can add mini-printers to perform real-time printing measurement data. Some of the other features of this instrument include advanced power management, RS-232 interface, TFT true color 2.8 in display, and Li-ion battery. It is easy to understand and easy to operate. This device is used in the industries like clothing, footwear, textile, leather, chemicals, printing, and plastics.
Key Features
- Through the SCM test
- Simple, accurate, easy-to-use, convenient
- Analysis the best assistant of the color, the simplest operation chromatic meter
- Chromaticity diagram, color difference bias Figure directly imply larger font display, be clear at a glance
- Optional Accessory: Flour measuring device/Liquid measuring device/Micro printer
- The design of human engineering mechanics
- Light Source: The LED blue light stimulate
- High repeat accuracy: ΔE <0.07
- Through National Meteorology (SCM)
- Sensor: Photo-diode array
- Advanced Power Management
Technical Specifications
| Display Mode | CIELAB CIELCH |
| Illumination Condition | CIE Recommendation: 8/d |
| Color Difference Formula | ΔE *ab |
| Measuring Aperture | ɸ8 mm |
| Measuring Condition | Observer: CIE 10° Standard observer Light source: D65 Contain light way: SCI SCE |
| Table Difference | ΔE <0.2 |
| Measuring Range | L:0-100 |
| Repeated Accuracy | ΔE<0.07 (take the deviation average after 30 times measuring the whiteboard) |
| Battery Power Supply | Li-ion battery, 5000 times Measurement |
| Measurement Time | 0.5 second |
| Storage Capacity | 100 standard samples and 20000 test sample |
| Display Screen | TFT true color 2.8 in @(16:9) Resolution ratio:400×240 |
| Interface of External | RS-232 (115200 bps) – connected with micro printer |
| Lifetime of Bulb | 5 years more than 160 million measuring |
| Dimension | 7.83 in×2.68 in×3.54 in (199 mmx68 mmx90 mm) |
| Net Weight | 1.54 lbs (700 g) |
| Humidity Range | Relative humidity less than 85%, without condensation |
| Working Temperature Range | 32 °F to 104 °F (0 °C to 40 °C) |
| Storage Temperature Range | -4 °F to 122 °F ( -20 °C to 50 °C) |
Additional Information
| Standard Accessories | 3000 mAH Li-ion battery
AC adapter User manual Warranty card |
| Optional Accessories | Flour measuring device
Liquid measuring device Micro printer |
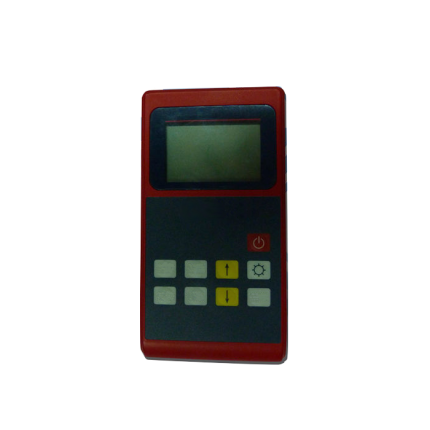
Structure
Appearance

Keys

 Up – move the position of the cursor on the screen; adjust the value of the activated items.
 Down – move the position of the cursor on the screen; adjust the value of the activated items.
 Paging – Switching between tabs.
 Saving – Save settings.
 Confirm – Confirm or activate selected items on the screen (a blue background of the item will be changed to a green background after activation); fast switching between “standard measurement” and “sample measurement”.
- Show screen – show measurement result etc.
- Body
- Measurement – Measuring
- Measurement port – Optical channel for measuring.

- Switch – In (I) or Out (O) of the instrument.
- Printing interface – connect to the printer to print the measuring data.
- Battery cover – cover for the special lithium battery compartment
- DC connector – dedicated power adapter connector.
Power
The colorimeter is powered by dedicated power adapter or special lithium batteries, the use of other facilities for power supply may damage the device. Ensure that the Switch is on Out (O) before connecting to the power adapter or mounting the battery.
Battery
- First, check and confirm if the Switch is on Out (O), then follow the arrow direction as shown in Figure 5, take out the battery cover by pressing down.

- Mount the battery into the compartment as shown in Figure 6, pay attention to the front and back of the battery.

- Follow the directions in Figure 7, press up to mount the battery into the compartment.

Power Adapter
- First, check and confirm if the Switch is on Out (O).
- Plug the input cable of the power as shown in the figure into the DC connector.

Interface
Layout
There are three parts of the colorimeter interface as shown in Figure 9, Page on top, Form on middle and Information on the bottom.

Page Details


Operation
Turn on
Before turning on the instrument, check if the external power has been connected or the battery has been mounted, ensuring a power supply to the instrument, then start the instrument, the screen will show starting Logo. After the completion of boot interface, the instrument into the self-test program, ensure the normal working of the instrument.
Color Difference Measurement
There are two steps for the color difference measurement which are “Type Sample Measurement” and “Sample Measurement”.
- The Type Sample measurement gets the standard color parameters of a Type Sample.
- The Sample measurement gets the parameters of the sample needed to be measured while calculating the color difference data between the Sample and the Type Sample.
Type Sample Measurement
As shown in Figure 15, the Type Sample measurement can be performed to get the color parameters of a Type Sample. The color parameters measured will be shown on the measurement page.
In the upper right corner of the page, the test current conditions, including light sources, lighting and light mode, are displayed.

Sample Measurement
After completing the Type Sample measurement, if it is required to measure the color difference between the Type Sample and the Sample, press “Paging” ![]() to switch the screen to “Sample Measurement” page as shown in Figure 16, the color difference parameter measured will be shown on the measurement page.
to switch the screen to “Sample Measurement” page as shown in Figure 16, the color difference parameter measured will be shown on the measurement page.

Meanwhile, the color bias will be shown on the right of the page to provide an intuitive color difference analysis.
Check out Information
Type Sample Record
Press “Paging” ![]() to jump to “Check out Information” page as shown in Figure 17 to check the saved data and to select from the drop-down menu by “Confirm”
to jump to “Check out Information” page as shown in Figure 17 to check the saved data and to select from the drop-down menu by “Confirm” ![]() as well as “Up”
as well as “Up” ![]() and “Down”
and “Down” ![]() keys if required.
keys if required.

In the current page, press “save” ![]() button. In the below Figure dialog box, choose “sample into” or “standard delete” operation.
button. In the below Figure dialog box, choose “sample into” or “standard delete” operation.

Sample Record
After selecting the Type Sample to be checked, select “Sample Record” option to switch the screen to the Sample record page of the Type Sample as shown in Figure 18, then select Sample record by “Confirm” ![]() as well as “Up”
as well as “Up” ![]() and “Down”
and “Down” ![]() keys to check out the color difference records of each Sample.
keys to check out the color difference records of each Sample.

System Setting
Press “Paging” ![]() to switch the screen to “System Setting” page as shown in Figure 19 to set the data saving ways as well as light mode, Light source (D50, D65, F11), tolerance, backlight time, the system date and time during the measurement.
to switch the screen to “System Setting” page as shown in Figure 19 to set the data saving ways as well as light mode, Light source (D50, D65, F11), tolerance, backlight time, the system date and time during the measurement.

Auto Save
There are two ways for saving the records .”Auto Save” and “Manual Save”.
When setting to Auto Save, the system will auto save each time measurement data of the Type Sample or the Sample. If the saving records of the Type Sample or the Sample are full, the measurement data will not be saved and will pop up a window as shown in Figure 20 to prompt if the storage should be cleared.

Manual Save
When setting to Manual Save, the system will not auto save data, it is required, after finishing measuring, to press “Save” ![]() for manually saving the data and will pop up a prompt box as shown in the Figure.
for manually saving the data and will pop up a prompt box as shown in the Figure.

SCI/SCE
The SCI is a measurement, including specular objects reflect light.
The SCE is a measurement, not including specular objects reflect light.
Source Selection
There are three kinds of the colorimeter standard light source to choose to measure, namely D50 (a relatively warm light and is used for prints and photographs daylight), D65 (average sunlight), F11 (a cold white light with low energy consumption and better color rendering color is specified in many European fashion industry standard light).