
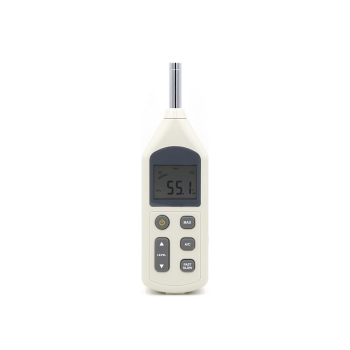
Description
Overview
GAOTek DO Controller Polarographic Sensor (10 Parameters Setting) is designed for monitoring the dissolved oxygen concentration and saturation percentage in the water with 1 or 2 points calibration. This device is equipped with a clear and bright LCD display that used to display measured values and mode indicators. It contains an integrated setup menu that allows to customize each displayed option to meet measurement requirements. This meter has RS 485 communication Interface with a signal input 4.00 ~ 20.00 mA.
Key Features
- Equipped with a Polarographic sensor.
- 1 or 2 points calibration using the air-saturated water and zero oxygen solution.
- Manual salinity and barometric pressure compensation improve the measurement accuracy.
- Automatic Temperature Compensation ensures accurate reading over the entire range.
- Low and high alarm limits can be set by user and automatically activate an external device.
- 4 to 20 mA output signal meets industry standard.
- System menu allows setting the 10 parameters, including the number of calibration points, measurement unit, alarm limits, hysteresis value, etc.
- Reset feature automatically resumes all settings back to factory default options.
- Clear and bright LCD display.
- Four multifunctional Keys.
- Contains Integrated Setup menu that allows to customize each displayed option.
Technical Specifications
| Range | 0.0 ~ 20.0 ppm |
| Accuracy | ± 0.5 ppm |
| Resolution | 0.1 ppm |
| % Saturation Of Oxygen | |
| Range | 0.0 ~ 200.0 % |
| Accuracy | ± 10 % F.S |
| Resolution | 0.10 % |
| Communication | |
| Signal Output | 4 ~ 20 mA |
| Load | Max. 500 Ω |
| Low And High Alarm Limits | 1.00 ~ 18.00 ppm, Selectable |
| Communication Interface | RS 485 |
| Connection Terminals | Detachable screw terminals |
| Others | |
| Temperature Compensation | 32 °F ~ 104 °F (0 °C ~ 40 °C) |
| Compensation Mode | Automatic |
| Barometric Pressure Correction | 60.0 ~ 112.5 kPa, 450 ~ 850 mmHg |
| Salinity Correction | 0 ~ 35 g/L |
| Environmental Conditions | 32 °F ~ 140 °F (0 °C ~ 60 °C) |
| Power Requirements | DC 24 V |
| Dimensions | 3.8 in x 3.8 in x 2.9 in (96 mm × 96 mm × 75 mm) |
| Weight | 12.3 oz. (350 g) |
Additional Information
The following list describes the standard accessories of the meter. After unpacking, please check all accessories are complete.
- Industrial dissolved oxygen probe
- Electrolyte solution and membrane cap

Safety Warning
- The controller shall be installed and operated only in the manner specified in this instruction manual.
- Only skilled, trained or authorized person should carry out installation, setup and operation of the meter.
- Do not install the controller in the following environmental conditions: Relative humidity is greater than 80, ambient temperature is higher than 140 °F (60 °C), the strong magnetic fields around meter.
- The rear panel of the controller has two screw terminals that used for connecting the
DC 24 V power supply. Make sure to cut off the main power before installation or maintenance. - Once the power supply cables are connected to meter, do not touch any screw terminals on the rear panel of the controller.
Installation
- Cut out a square hole approximately 3.6 x 3.6 in (91 × 91 mm) in the mounting panel.
- Remove the mounting bracket from controller, place the meter into the square hole.
- Replace the mounting bracket and push the meter forward until it is fully seated on the mounting plate.

Display
GAOTek DO Controller Polarographic Sensor (10 Parameters Setting) is equipped with a clear and bright LCD display that used to show measured values and mode indicators. The following table describes the meaning of each indicator.
INDEX:
| INDICATOR | DESCRIPTION |
| Calibration | Indicates meter is in the calibration mode |
| Setup | Indicates meter is in SETUP mode |
| ATC | Indicates meter is in the temperature compensation mode |
| ALM1 | Indicates measurement exceeded the specified high limit |
| ALM2 | Indicates measurement exceeded the specified low limit |
Keypad
The controller has four multifunction keys, names and symbols describe each function key controls.
| KEY | FUNCTION |
|
|
● Power the meter ON/OFF.
● Press and hold the key to enter the setup menu. ● Press the key to exit the calibration or setting mode. |
| ▲|CAL | ● Press the key to enter the calibration mode.
● Press the key to increase setting value. |
|
▼|°C |
● Press the key to enter the temperature calibration mode.
● Press the key to decrease setting value. |
| |
● Toggles between saturation and concentration mode.
● Confirms the calibration, setting value or displayed option. |
Refilling Electrolyte Solution
- Take out the dissolved oxygen probe from the packaging. Unscrew the membrane cap from the probe.

- Fill the membrane cap halfway with electrolyte solution.

- Screw the membrane cap onto the probe, excess electrolyte will drain out.
- Be sure the cathode of probe makes contact with membrane cap, the electrolyte solution in membrane cap should be without an air bubble.

Connecting the Cables
- Before proceeding, ensure the power supply cables are disconnected from the power source.
- The following list describes the definition of each screw terminal on rear of the controller.

INDEX:
| NO. | TERMINAL | DESCRIPTION |
| 1 | DO ( – ) | DO input |
| 2 | — | No connection |
| 3 | DO (+) | DO input |
| 4 | — | No connection |
| 5 | TC ( – ) | Temperature input (Negative) |
| 6 | TC (+) | Temperature input (Positive) |
| 7 | 485(B) | RS485 signal output (B) |
| 8 | 485(A) | RS485 signal output (A) |
| 9 | DC24 (+) | DC24 (+), linear power supply |
| 10 | 4~20mA | 4~20mA analog output |
| 11 | GND | Earth ground |
| 12 | DC24 (+) | DC24V (+), linear power supply |
| 13 | DC24 ( – ) | DC24V ( – ), linear power supply |
| 14 | NC2 | Relay resting position (NC2) |
| 15 | NO2 | Relay working position (NO2) |
| 16 | COM2 | Relay Common (COM2) |
| 17 | NC1 | Relay resting position (NC1) |
| 18 | NO1 | Relay working position (NO1) |
| 19 | COM1 | Relay Common (COM1) |
| 20 | — | No connection |
Setup Menu
GAOTek DO Controller Polarographic Sensor (10 Parameters Setting) contains an integrated setup menu that allows you to customize each displayed option to meet measurement requirements.
| PARAMETER | DESCRIPTION | OPTIONS | DESCRIPTION | DEFAULT |
| SALt | Salinity Coefficient | 0.0 | Setting Range: 0~35ppt | 0.0ppt |
| PrES | Barometric Pressure Coefficient | 76.0 | Setting Range: 450~850mmHg | 760mmHg |
| CAL |
Calibration Point |
1 | 1 point | ● |
| 2 | 2 points | |||
|
UNIt |
Measurement Unit |
mg/L | Concentration Unit | ● |
| ppm | Concentration Unit | |||
| % | saturation | |||
| °C | Degrees Celsius | ● | ||
| °F | Degrees Fahrenheit | |||
| dATE | Date and Time | — | — | |
| AL-L | Low Alarm Limit | 4.00 | Setting Range: 1.00~18.00mg/L | 4.00mg/L |
| AL-H | High Alarm Limit | 10.00 | Setting Range: 1.00~18.00mg/L | 10.00mg/L |
| HyS | Hysteresis value |
0.1 |
Setting Range: 0.01 ~0.10mg/L | 0.1mg/L |
| AO-L | Analog output (Low) | 4.00 | Setting Range: 1.00~18.00mg/L | 4.00mg/L |
| AO-H | Analog output (High) | 10.00 | Setting Range: 1.00~18.00mg/L | 10.00mg/L |
| rST |
Reset |
YES | Restores the parameters back to default settings | |
| nO | Disable | ● |
OTHER INFORMATION:
- Select a High/Low limit setting value will activate the controller when the measuring value goes above or below the setting value. Note, both setting values cannot input the same value.
- Hysteresis prevents rapid contact switching if the measuring value is fluctuating near the set point. Example: You have set the high alarm point at 10.00 mg/L and hysteresis value at 0.1 mg/L. If the measuring value overshoots the 10.1 mg/L, the controller will activate an external device. When the measuring value drops to 9.9 mg/L, the external device will switch off.
- The meter has RS 485 communication function, the default is 4.00 ~ 10.00 mg/L corresponds to 4.00 ~ 20.00 mA.
- Reset function will restore the meter back to factory default parameters, all calibration values and selected parameters will be reset.
HOW TO SET THE DEFAULT PARAMETERS?
- Press and hold the key for 3 seconds to enter the setup menu, the display shows selectable parameter and page number.
- Press ◄ or ► key to scroll through menu, select the parameter you want to set (Refer to Setup Menu section).
- Press ENTER key to confirm, the display shows an option in the submenu.
- Press ◄ or ► key to set the value or select an option.
- Press ENTER key to confirm, the meter returns to measurement mode. Setting is completed.
SETTING THE DATE AND TIME
- Press and hold the key for 3 seconds to enter the setup menu.
- Press ◄ or ► key until the meter shows “Date” option.
- Press ENTER key to confirm, the display shows current date and time.
- Press ◄ or ► key to set the parameters.
- Press ENTER key to confirm until the meter returns to measurement mode. Setting is completed.
EXIT THE SETUP MENU:
During the setup process, press ![]() key, the meter will return to measurement mode immediately.
key, the meter will return to measurement mode immediately.
Temperature Compensation and Calibration
DO Controller Polarographic Sensor (10 Parameters Setting) comes with a DO probe included built-in temperature sensor. When the wires of the sensor are connected to meter, the display will immediately show “ATC” indicator. The meter is now switched to automatic temperature compensation mode.

TEMPERATURE CALIBRATION:
During the measurement, if the temperature reading displayed differs from that of an accurate thermometer, you need to calibrate the meter.
Press °C key to enter the temperature calibration mode, the display shows current temperature reading

- Press ◄ or ► key to set the temperature value.
- Press ENTER key to confirm. Calibration is completed.
DO Calibration in % Saturation Mode
DO Controller Polarographic Sensor (10 Parameters Setting) can be calibrated quickly in air. In the percentage saturation mode, the meter is able to perform either 1 or 2 points calibration. For single point calibration, we recommend that you perform 100 saturation calibration in the air. For the 2 points calibration, you need to use zero oxygen solution.
100% SATURATION CALIBRATION:
- Make sure that you have selected 1-point calibration in the setup menu.
- After the dissolved oxygen probe connected with the meter, turn the meter on 10 to 15 minutes to polarize the sensor.
- Press CAL key, the meter shows “CAL1/100”.
- Hold the dissolved oxygen probe in the air or place the sensor into air-saturated water for 3 to 5 minutes. Press ENTER key to confirm. Wait for the measured value to stabilize, the display shows “END”. Single point calibration is completed.
POINTS CALIBRATION:
- Make sure that you have selected 2 points calibration in the setup menu.
- Repeat steps 1.2 to 1.4 above. When the first calibration point is done, the display shows “CAL2/0”. The meter prompts you to continue with second point calibration.
- Submerse probe in the zero oxygen solution, stir the sensor gently.
- Press ENTER key to confirm. Wait for the reading to stabilize (this can often take more than 10 minutes), the display shows “END”. The meter returns to measurement mode. Calibration is completed.
Performing a percentage saturation calibration will simultaneously calibrate the corresponding mg/L (or ppm) concentration value. Therefore, additional mg/L calibration isn’t required in most circumstances.
EXIT THE CALIBRATION:
During the calibration process, press ![]() key, the meter will return to measurement mode.
key, the meter will return to measurement mode.
Measurement
DO Controller Polarographic Sensor (10 Parameters Setting) is suitable for measuring the water, wastewater, brine and other liquids. If you use meter to measure seawater or other water containing large amounts of salt, please set the salinity coefficient before use. Some gas and steam such as chloride, sulfur dioxide, sulfureted hydrogen, ammonium, carbon dioxide and iodine can permeate the membrane via diffusion. So their existence will influence the measurement of dissolved oxygen.
If the sample contains solvent, grease, sulfide and alga, the membrane will be blocked, damaged or eroded.
- Press
 key to turn on the meter, wait for 15 minutes to polarize the probe.
 - If necessary, to set the barometric pressure and salinity coefficients in the setup menu (Refer to “SETUP MENU” section).
- Submerse probe in the sample solution, make sure the temperature sensor on the probe is fully immersed.
- Stir the probe gently, wait for the reading to stabilize, record the measured value on the display.

Electrode Care and Maintenance
- Please always keep probe’s membrane moist.

- If you do not use the probe for long periods, please screw off membrane cap and rinse the probe’s cathode, anode and the membrane with distilled water, then soak up residual water on them with filter paper, and install the probe.
Troubleshooting:
|
LCD DISPLAY |
CAUSE |
CORRECTIVE ACTION |
|
—- |
Measured value is out of range | Check the DO membrane whether clogged, dirty or broken |
|
ERR |
Electrolyte solution is depleted | Refilling electrolyte solution |
| Zero oxygen solution is contaminated | Replace the calibration solution |
Pressure VS Altitude Table
| ALTITUDE (m) | kPa | mmHg |
| 0 | 101.3 | 760 |
| 100 | 100.1 | 750 |
| 200 | 98.8 | 741 |
| 300 | 97.6 | 732 |
| 400 | 96.4 | 723 |
| 500 | 95.2 | 714 |
| 600 | 94.0 | 705 |
| 700 | 92.8 | 696 |
| 800 | 91.7 | 688 |
| 900 | 90.5 | 679 |
| 1000 | 89.4 | 671 |
| 1100 | 88.3 | 662 |
| 1200 | 87.2 | 654 |
| 1300 | 86.1 | 646 |
| 1400 | 85.0 | 638 |
| 1500 | 84.0 | 630 |
| 1600 | 82.9 | 622 |
| 1700 | 81.9 | 614 |
| 1800 | 80.9 | 607 |
| 1900 | 79.9 | 599 |
| 2000 | 78.9 | 592 |
How to prepare the zero oxygen solution
Dissolve 500mg of sodium sulfite reagent and a small amount of cobalt(II) chloride hex hydrate (CoCl2 ● 6H2O) in the 250 mL distilled water, mix the solution until reagent is completely dissolved.
Hazardous Substance Statement
GAOTek is committed to the reduction and eventual elimination of all hazardous substances in both the manufacturing process and finished products we supply. We have an active manufacturing and procurement program to minimize and eliminate the use of harmful heavy metals such as cadmium, lead, mercury and the like. New technologies and design parameters are also promoting these efforts and we expect to have little or no such materials in our product in the coming years.